Archive for January, 2012

February challenge

Tuesday, January 31st, 2012

As mentioned in class: our main challenge this term will be organized a bit differently this year. Instead of ever-new small design challenges we will have one continuous one until the end of February. At that time, we will select one or two of our projects, optimize, and implement them.

Underlying is the main approach for this term: the idea of interaction as performance and both as being process-based. Crafts and making cultures are seen as equally process-based. Thus, we aim to design a digital craft process – the making of something as the “big challenge.”

We want to spend a bit more time on the process of developing our ideas. So the first deliverable (next week) will be a presentation of the idea – just like our concept presentations last term. The second step is presentation of a prototype (the week later). If possible, it would be good to test your process already on the rest of the group like we did with our projects this week. Finally, we will have 5 different and revised projects that we, then, optimize for a submission to Flux projects.

You can find out more about Flux here.

But please remember the experiment we are doing here focuses on the question what parallels we can detect between the making and the interacting and the performing processes.

Telephone City

Monday, January 30th, 2012

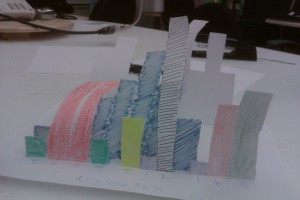
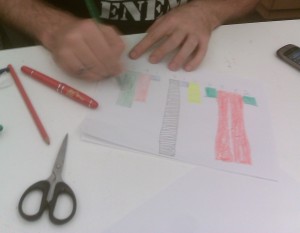
This craft activity is designed to remind people to call friends and family members from time to time by creating and displaying the craft. The idea is to use paper cutting, one of the simplest forms of craft, to transform single set of telephone digits to visible building blocks.

The procedure of making a single building is as followings:

First Step—-Draw


Take out a piece of paper, write down the number on 1/4 part of the paper as baseline. Then draw the same amount of squares under the corresponding number.

Second Step—-Cut
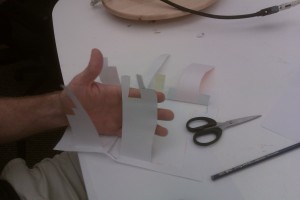
Cut the outline of the blocks out. Cut two sides as well to get the negative shape. Remember to keep the baseline of each side attached.

Third Step—-Fold
Fold the cut out parts up.

You can populate the building blocks and eventually form a city skyline. Display your telephone city in your territory and you are always reminded to get in touch with your beloved ones.

Design A Craft: Macarobots

Monday, January 30th, 2012

For this first assignment, I suggested a combination of noodle-based sculpture and simple machines. To do this activity, you need macaroni (and various other pastas), a glue gun, and if you’re going the mechanical route, some simple motors, levers, and other moving parts.

Build your own noodle sculpture, and then make parts of it mobile by working in these automatic machines. The possibilities are limitless!

Real Ant Moebius Strip

Monday, January 30th, 2012

UPDATES: more recent pics at the end (video coming soon!)

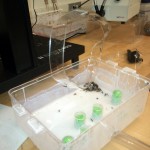
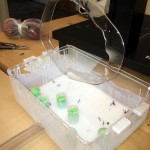
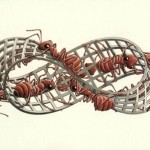
The goal of this craft is to create a hanging Moebius strip for live ants to crawl upon. It is inspired by the escher drawings of ants on Moebius strips, and also the Moebius strip’s archetypal description that “If an ant were to crawl along the length of this strip, it would return to its starting point having traversed every part of the strip (on both sides of the original paper) without ever crossing an edge.”

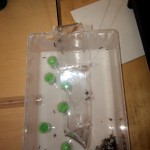
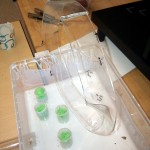
We are going to make a primarily sculptural/aesthetic device to hang over our boxes of ant nests. We should be able to load ants onto the strips and watch them wander around in endless crazy loops. To keep with the current aestethic of our ant containers, the strips will be forged from transparent acrylic. The primary crafting experience in this project comes from building the tacit knowledge of turning and manipulating hot molten acrylic.

Materials:

To create this project you will need:

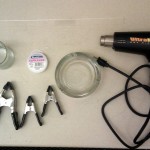
  • 24 inch long acrylic sheets (1/8th in)
  • 3 Hard rubber (somewhat heat resistant) clamps
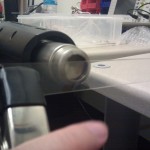
  • Heat gun
  • Monofilament (thin fishing string)
  • Cylindrical, heavy, heat resistant wrapping surface. I used 7-8inch diameter glass ash tray.
  • Additional heat resistant cylinder (comes in handy sometimes)
  • Something to cut the acrylic sheets (I used a laser cutter, a dremel with the right bit could also work, or a bandsaw)
  • Wet sponge. If you want to make a part of the acrylic instantly cooler and freeze into place, dab it with the sponge.

Step One: Cut

First you will need to make several strips from your original acrylic sheet. Follow the attached adobe Illustrator template to laser cut it, or base your cutting off. In short, each strip should be about 24 x 3/4 inches, and have several small holes in each end. Make several strips to test out the techniques on before doing the final one.

Step Two: Play
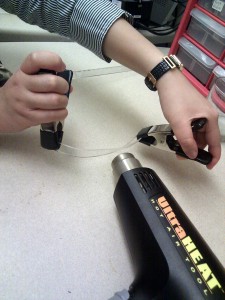
Prop the heatgun on your worktable, and using some scrap strips of acrylic, and grabbing it with your clamps, practice smoothly bending and twisting the plastic. Get a feel for how quickly it heats up, and at what distances from the heat gun. The goal is to avoid extremely localized heating which can result in sharp bends, or really hot areas that can make it bubble.

Step Three: Twist
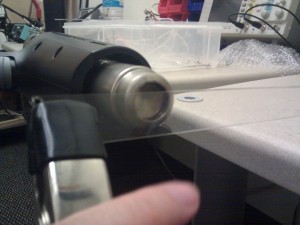
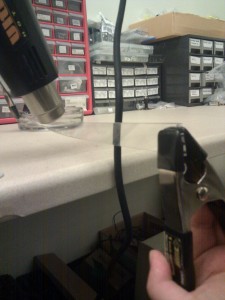
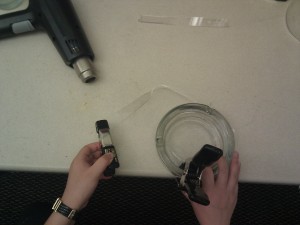
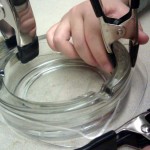
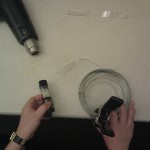
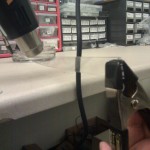
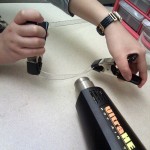
Clamp one end of the strip to the thick ash tray, and hold the other clamped end of the strip in your hand. Slide the strip slowly back and forth in front of the heat gun while rotating the end in your hand 180 degrees. It is best to twist it even a little further than 180, because when we start wrapping the strip into a circle it tends to try to unwind itself.

Step Four: Wrap
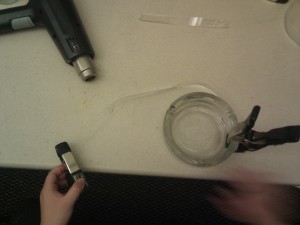
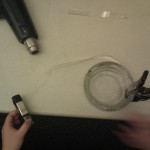
Now that your strip has a nice smooth twist in it, keep the entire thing heated up and begin slowly bending it to try to make the ends touch. Do not bend it too quickly or the strip might snap! Don’t leave the heat gun pointed in one area too long or you may get a very sharp bend, which may or may not be the aesthetic you are looking for.

Step Five: Connect and Smooth
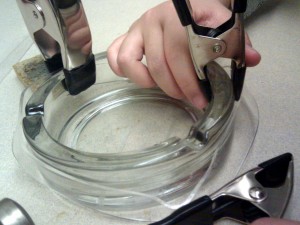
When your bend is good enough to connect both ends of the strip, clamp them both onto the ash tray in the same spot. Use the heat gun to go back around the strip and smooth out, or make certain areas more circular and bendy. Keep your ends clamped together around the dish in the moebius shape until it has thoroughly cooled.

Step Six: Tie it up

Once cool, use your fishing wire to tie the ends together. Lace the holes together tightly and trim the ends.

Step Six Alternate: Fuse

If you are really good with acrylic you could also try to use weld-on to fuse the ends together, or simply heat the ends up REALLY hot and squish them together. I have tried both, but they were hard to make it look nice.

Step Seven: Hang and load

Loop another string of mono-filament through the end holes to make a long strap for hanging your moebius strip.
 

Motherboard printing

Sunday, January 29th, 2012

This idea was inspired by the ornamental work that was part of the William Morris article we read for the week – and how his sense of form and function differs from the cooperate style that is so dominant at Georgia Tech. I am often confused by ornamental art and wonder why anybody would spend his or her time making exactly this pattern. Here is one of Morris’ patterns, for example:

So, in my project I try to get a pattern without really designing it but instead using pure functionality. To do so, the project uses print techniques and computer hardware components as shapes.
The main design task for a motherboard or circuit is functionality. To save space and money, these boards are usually optimized not for any aesthetic value but for cheapest and most reliable operation. What if one could take the trace of this optimization and use it in our crafts context? Then you would get a shape that reflects optimized function but – I argue in this project – is also an ornamental pattern.

To do my craft exercise, you need:
– colors
– brushes
– an old board (I took one from an old remote control car)
– some paper
– some piece of clothing (I used some socks)
You paint the backside of the board with a color of your choice, do some test prints on the paper to get rid of the surplus paint, and when you start to get the desired result with the motherboard shape, you print on the piece of clothing.
I used a remote control car and some socks to play with the idea that you can wear the interiors of a electric car on your feet. Maybe it speeds you up?

Craft Activity: Western Gua Sha

Wednesday, January 25th, 2012

In designing for this challenge, I drew heavily from the Niedderer reading:

This remarkable quality of craft seems to emanate from the emotion bestowed on craft objects both by the maker within their creation and by the owner through possession, display and use. They consist in material quality and sensitivity of a craft object which imbue it with personal emotions and meaning, values and memory that can be perceived as related to the idea of
the gift.
For this project, I chose an object from my childhood: a china or ceramic spoon that is used to give massages in a process called “Gua Sha”. This process is soothing and usually used to “remove fever” from the patient or receiver. This is a very personal exchange between the administrator and receiver, as it entails a certain trust that typically exists between doctor and patient, or parent and child (as this is typically a folk remedy).
Thus, the kit that I provided is to make a personal massager that can be given as a gift. The kit that I provided includes:
  • A vibrating core, composed of a NanoBug, air-dry clay, and tin-foil
  • A tub of clay, for the kit receiver to create a shape that may mold to their own hand
  • A pack of markers, to decorate after the clay is dry
  • An instruction sheet

Both the process of making and using will imbue this simple item with emotional value from both the creator and the user.

Modular Craft: Outwards & Down

Wednesday, January 25th, 2012
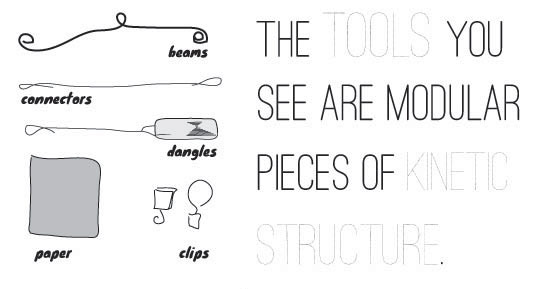
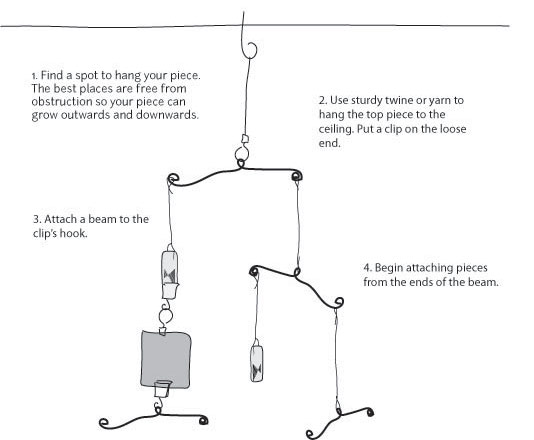
The modular pieces of a hanging mobile are the tools people use to craft this piece according to their specifications. Clips, string, hooks and metal wire are provided as a guides to get started, but by using inexpensive objects found around the home, we hope builders are inspired to create additional parts from various mudane bobbles.
The next step is to digitize the mobile, which I hope to accomplish by wiring the piece as a simple circuit. Individual parts will be equipped with analog inputs (tilt sensors, photocells) that respond to the environment and store values that control other parts equipped with digital and analog outputs (LEDS, speakers) once the circuit is completed. Additional opportunities for kinetic action are possible with Nitinol wire, which assumes a set shape when exposed to heat.  This way, the modular piece is a representation of the user’s actions and the immediate environmental context in which it behaves

first 2012 challenge

Wednesday, January 18th, 2012

Welcome to the new year – and the new challenge.

As we turn our attention to crafts and digital media a key question is how to incorporate these crafts. One approach is to focus on the procedurality of crafts. One has to “make.” The challenge for this week is in this spirit:

Create a “craft activity” that is a gift for somebody else. The person, for whom the activity is, should engage with your piece and this engagement, the “making” is where we see currently the craft included. It would be fabulous to include digital media, but if your “craft activity” is analogue only, that is okay, too.