Some more scribble documentation
Monday, February 18th, 2013
There are some presentations over here at TEI 2013 that kind of touch on craft. One is Movement Crafter
The movement crafter attempts to reconcile the pace of new technologies with traditional crafting activities that are performed as pastimes. The project explores concepts of quiet communication and technology hybrids and attempts to support crafting without making the craftsperson overly selfconscious of their practice.
What it does is tracking the movements of two pairs of knitting needles and visualizing it. When I tried it only one of the two stations worked and it was not too precise. But it kind of relates to the handiwork concept from Ashton.

Another art project deals with the special ink that changes visibility under changing heat.
Transience is the Japanese calligraphy work with dynamic color changes. The scene where the letter colors are changing from moment to moment can give af”uent dynamism and feeling of vitality of calligraphy to viewers, and at the same time, it can express stream of time. Calligraphy is integrated with technology and materials seamlessly and Transience is produced to show ever-changing aesthetics fermented in Japan. In order to change letter colors on paper, we developed our original chromogenic mechanism from functional inks and conductive materials. For producing the chromogenic technology suitable for paper, we examined ink materials repeatedly, and as a result we realized the expression where calligraphy harmonizes with computer.
It was beautiful to see the change of the ink over time – but mainly because the lettering looked so good. Paint Pulse was definitely more ambitious.

Our scribbles from the discussion today regarding guides and rules for digital intervention in craft.

Sam pointed me to that – and some of us might not be aware of this trend:
Open Source Philosophy. from Open Source Ecology on Vimeo.
Their spearhead project is the Global Village Construction Kit. As we drift into crafting and social context, it might be a good touching point for where digital media stand.
While considering creative coding as a digital craft, I think the most striking and emotional part is the realization you know what to do and now you just have to do it.
The notion of the dots getting finally connected is mesmerizing : among all the possibilities a path gets drawn, and the object you want to build exists in the virtual space of your mind. In the Keller and Keller theoretical framework, it would be close to the moment when the umbrella plan gets finally assembled.
Seeing the code as the material this is the moment when you feel how to shape it, assemble it, which parts are going to be thrown away and which are the ones that are going to stay.
Design Idea
I want to share this idea of connecting the dots in a playful way, while having multiple viable solutions.
To implement this idea, I suggest creating a game using a variation on the theme of exquisite corpse.
One person, the “language master” will write down a short sentence. Then for each of the word of the sentence, he will choose 4 other words (similar or not).
Other people, the “language wannabees” will then have to try to reconstruct the original sentence. You can choose to collaborate, and help each others (share knowledge about the language master to increase the chance of success), or on the other hand try to sabotage other’s work (giving crappy advice) to simulate the competitive environment creative coders are living in.
The first one to find the right solution becomes the brand new language master and pick up a new sentence and a set of words.
During the process you might write down unsecessful sentences for further reference.
This can be implemented using a sheet of paper but as we’re trying to live in a digitial era, I did it using sifteo cubes.
The choice of only one solution valid among all the possibilities is arbitrary, and could be extented to any solution the language master likes (or the group if you’re prefer democracy).
Pictures
[coming soon]
Crocheting is technically just a series of knots looped through previous knots in the yarn. It “builds up” through different sequences of actions. The actions include looping yarn around a hook, pushing the hook through existing loops, and pulling the hook through again. The process is mechanically simple. However, skill and practice is required to achieve an even series of knots with the right tension on the yarn. Too loose and the work shows unsightly holes. Too tight, and the fabric buckles, or worse, the needle does not easily slip through the loop on the next row.
The two hands work together to crochet. One hand maneuvers the hook and loops the yarn. The other hand holds the work and feeds the yarn to the hook that’s looping it. This hand holding the work is responsible for maintaining an even tension. It does so by pulling the work down while the hook in the other hand tries to pick up the work as it pulls the yarn through existing loops.
A crochet piece achieves visual complexity when stitches are made in different combinations. This requires the crocheter to count silently while they work and maintain an even tension. Some rows are repetitive and induce a meditative state. At this point, the count is internalized as movement. The crocheter actually feels the rhythm of the pattern as they carry out manual tasks with the needles and yarn. The actions result in a tempo that internalized to relieve the need to count for long periods of time.
To communicate this tacit feeling of this work, this intervention simulates a repetitive double crochet chain. A Processing application visualizes the ideal sequence of operations, the passage of time, and input from the sensors attached to the hook and the work.
The left hand holds the work. The work is a crocheted pouch with a force sensing resistor inside. The user grips the work firmly when pulling new yarn through existing loops. This additional force counters any pull from the hook and maintains even tension. Since the hand holding the work also feeds yarn to the hook, it should otherwise relax to prevent stitches from being worked too tight.
The hook has a photocell attached to its tip. The hook slips in and out of an semi-opaque tube. When the photocell registers a transition from lighter to darker environments, the stitch has “passed through” a loop and a new knot has been made. A double crochet consists of three knots in one loop. So, the user will repeats this for a total of three times before starting again.
Users should attempt to match their tension to the tension levels illustrated at different points on the action pattern. Likewise, knots registered by the photocell should be completed at the three specified times. As users’ actions converge on the pattern, they start to understand the feel of tempoed action. Crocheters maintain this tempo between tool and hands to sustain peace of mind and achieve an even tension for their material.

Practice holding the fabric with the correct tension. A photocell on the end of the crochet hook detects a “stitch” when it enters the dark tunnel. A force sensing resistor measures the grip of the hand holding the work.

When the circles align, it’s time to retract the hook into the tube and make a stitch.
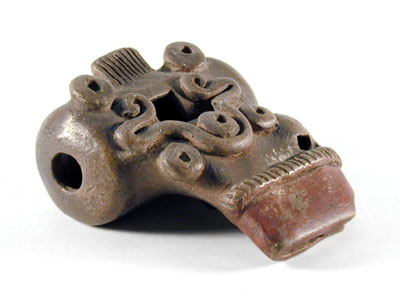
The absolute most time consuming/frustrating/dangerous part of making a sweet potato clay ocarina is the voicing hole. Tuning the instrument can be difficult, but with enough time and the right techniques and tools, it’s much more of a precise science than the voicing box.
To make the box, one must cut out a small hole that matches where the air stream is coming from the mouthpiece and then cut a wedge, so it divides the air stream (somewhat) perfectly. This must be done while the clay is still malleable, the ocarina is in two pieces (so structurally unsound) and often must be done and redone several times throughout the whole process.

In order to test if it’s working, one must put the tools down, make a temporary seal (place the two halves together) then blow. Sometimes one can manipulate the mouthpiece, other times the ocarina is too delicate, and will break.
If I were to move completely away from actually doing this, I would propose two plastic shells be used, one with a hole for a mouthpiece like part. This must be rectangular. The user would try to put the mouthpiece in alignment with the voicing wedge as perfectly as possible.

The user can test how good the connection is by putting the mouthpiece hole in front of an LED that is turned on. The light transmits through the hole to a photo resistor on the underside of the wedge that is calibrated for the room. The photoresistor will make a second LED brighter or darker based on the amount of light it receives.

Too much or too little light make the light go out (just like if it were the ocarina, it would make no sound). Because there’s not a definite “you did it right” feedback in the actual process, the led getting slightly brighter and softer is the perfect analogy. A user can only tell if they’ve gotten it right by a subjective sense. It’s very obvious when it’s making sound, but whether the sound is getting better with each adjustment is a skill that takes a trained ear and many hours to determine.
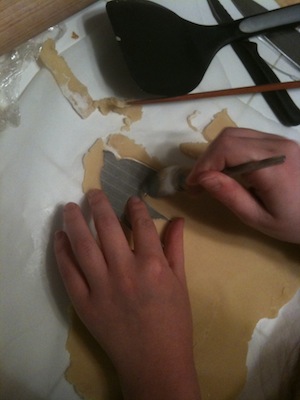
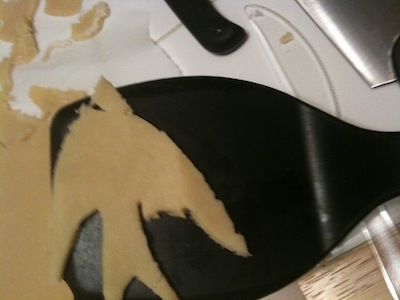
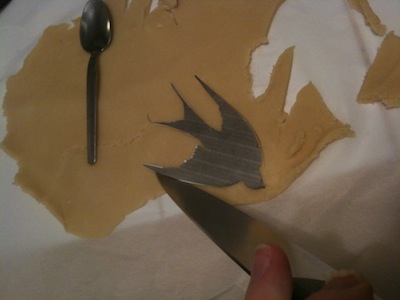
The “feel” for stenciling is best exemplified through the cutting process. While the design is certainly an important part of the craft (and experience helps determine what is “cut-able” and what isn’t), the act of slicing the plastic with an Exacto knife is what requires some real manual dexterity. It’s the part you really need to just “do” for awhile until you figure out the best approach. You learn what kind of curves you can do in one stroke, which areas to tackle first, and how to create corners.
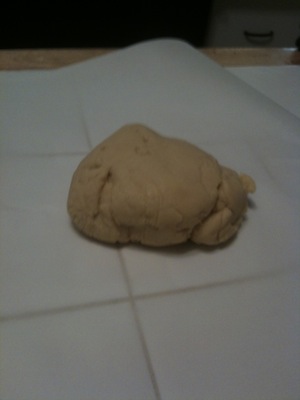
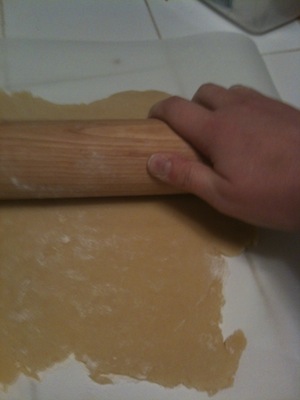
To recreate this experience, I thought about other activities that involve some kind of tracing or complicated line following. I was inspired by our trip to the craft center. Rolling out the clay reminded me of rolling out cookie dough. I thought about what it would be like to freehand cut sugar cookies (rather than using a cookie cutter to stamp them out). I think there are some similarities to plastic (hard plastic/hard dough cracks more easily, soft plastic/dough cuts too easy, doesn’t keep shape).
I wanted to experiment with different cutting tools to find the right level of difficulty. It shouldn’t be too easy to cut the dough. It should be very difficult to turn sharp corners. Pulling the cut dough away from the rest should also be slightly challenging.
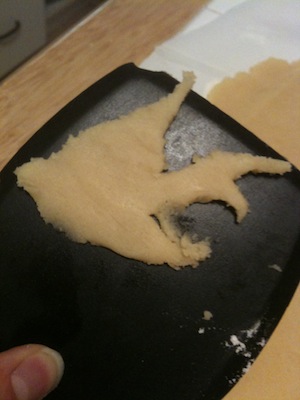
Overall, much like cutting a stencil, it seemed like any of these tools could have worked if I spent the time to practice. Like stenciling, the sharpest implements cut best, but also allowed me to make mistakes more easily.
Preparing the dough and tools:
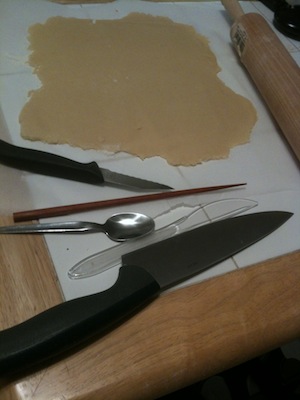
Attempting cuts with various tools:

Pairing Knife
Pairing knife didn't work out so well...

Sharp Chopstick
Small Spoon
Attempt with plastic butter knife
The big gun(s): Chef's Knife
What is your sound?
Last week I wrote about the craft of reed making for an oboe. One aspect in the process of reed making which is important is the thickness of the reed. The thickness of the reed has a lot of influence on how it will be used, how the oboe with reed will sound and play. So somebody making a reed has to experience this, it is very personal. What kind of reed do you want, how do you want to play?
To experience this I propose to create a device that measures air pressure and based on the air pressure makes a specific sound. The idea is that you have to blow into a device and the way you blow and the strength of it will be measured using air pressure sensor (as shown in the image above).
You could conceal this device in something made by clay, and shape it to afford blowing into it. It could look like this:
The goal is not to create the most ‘pure’ sound, no sound coming out of the device will be wrong. The idea is that you find your own sound. What sounds good to you and how do you need to blow to achieve this sound? In the end the data is stored together with a recording of all the sounds you created. In visualization you can see the way you blew and you can hear the sound that is related to the way you blew.
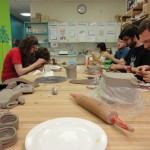
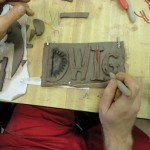
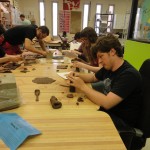
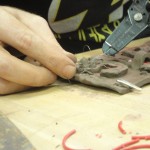
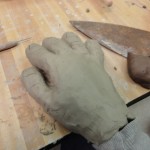
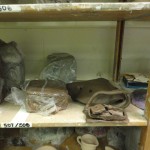
Today we finally played with some pottery at the craft center. And DWIG became the proud owner of its own storage shelf.