Archive for the ‘Design Challenge’ Category

Sifteo Cubes – Cadavre exquis

Wednesday, February 6th, 2013

While considering creative coding as a digital craft, I think the most striking and emotional part is the realization you know what to do and now you just have to do it.

The notion of the dots getting finally connected is mesmerizing : among all the possibilities a path gets drawn, and the object you want to build exists in the virtual space of your mind. In the Keller and Keller theoretical framework, it would be close to the moment when the umbrella plan gets finally assembled.
Seeing the code as the material this is the moment when you feel how to shape it, assemble it, which parts are going to be thrown away and which are the ones that are going to stay.

Design Idea

I want to share this idea of connecting the dots in a playful way, while having multiple viable solutions.
To implement this idea, I suggest creating a game using a variation on the theme of exquisite corpse.
One person, the “language master” will write down a short sentence. Then for each of the word of the sentence, he will choose 4 other words (similar or not).

Other people, the “language wannabees” will then have to try to reconstruct the original sentence. You can choose to collaborate, and help each others (share knowledge about the language master to increase the chance of success), or on the other hand try to sabotage other’s work (giving crappy advice) to simulate the competitive environment creative coders are living in.

The first one to find the right solution becomes the brand new language master and pick up a new sentence and a set of words.
During the process you might write down unsecessful sentences for further reference.

This can be implemented using a sheet of paper but as we’re trying to live in a digitial era, I did it using sifteo cubes.

The choice of only one solution valid among all the possibilities is arbitrary, and could be extented to any solution the language master likes (or the group if you’re prefer democracy).

Pictures
[coming soon]

Cutting Stencils with Cookie Dough

Wednesday, February 6th, 2013

The “feel” for stenciling is best exemplified through the cutting process. While the design is certainly an important part of the craft (and experience helps determine what is “cut-able” and what isn’t), the act of slicing the plastic with an Exacto knife is what requires some real manual dexterity. It’s the part you really need to just “do” for awhile until you figure out the best approach. You learn what kind of curves you can do in one stroke, which areas to tackle first, and how to create corners.

To recreate this experience, I thought about other activities that involve some kind of tracing or complicated line following. I was inspired by our trip to the craft center. Rolling out the clay reminded me of rolling out cookie dough. I thought about what it would be like to freehand cut sugar cookies (rather than using a cookie cutter to stamp them out). I think there are some similarities to plastic (hard plastic/hard dough cracks more easily, soft plastic/dough cuts too easy, doesn’t keep shape).

I wanted to experiment with different cutting tools to find the right level of difficulty. It shouldn’t be too easy to cut the dough. It should be very difficult to turn sharp corners. Pulling the cut dough away from the rest should also be slightly challenging.

Overall, much like cutting a stencil, it seemed like any of these tools could have worked if I spent the time to practice. Like stenciling, the sharpest implements cut best, but also allowed me to make mistakes more easily.

Preparing the dough and tools:


Attempting cuts with various tools:


Pairing Knife


Pairing knife didn't work out so well...

Sharp Chopstick

Small Spoon

Attempt with plastic butter knife


The big gun(s): Chef's Knife


What is your sound?

Tuesday, February 5th, 2013

What is your sound?

Last week I wrote about the craft of reed making for an oboe. One aspect in the process of reed making which is important is the thickness of the reed. The thickness of the reed has a lot of influence on how it will be used, how the oboe with reed will sound and play. So somebody making a reed has to experience this, it is very personal. What kind of reed do you want, how do you want to play?

To experience this I propose to create a device that measures air pressure and based on the air pressure makes a specific sound. The idea is that you have to blow into a device and the way you blow and the strength of it will be measured using air pressure sensor (as shown in the image above).

You could conceal this device in something made by clay, and shape it to afford blowing into it. It could look like this:

The goal is not to create the most ‘pure’ sound, no sound coming out of the device will be wrong. The idea is that you find your own sound. What sounds good to you and how do you need to blow to achieve this sound? In the end the data is stored together with a recording of all the sounds you created. In visualization you can see the way you blew and you can hear the sound that is related to the way you blew.

Process of making an Ocarina.

Wednesday, January 30th, 2013

One day at around three in the morning I decided I’d learn how to make an ocarina.  After spending a few hours reading about how to make one, I went to the Georgia Tech craft center.  Since then I’ve made several, but have only fired and tuned a few, due to the enormous amount of time it takes to tune them.


Cultural Craft
An ocarina is a wind instrument that uses both hands and a fingering system to play different notes.  Hand-made ocarinas are typically made out of clay or wood, and machine made ones are typically made with plastic.  Wooden ocarinas are typically shapped in a rectangular fashion, whereas the clay one I made are typically shaped like an egg with an attached mouthpiece.
 
Prior Knowledge
I know the general shape of a clay ocarina, and I’ve made a couple before.  I learned this from watching youtube videos, reading tutorials, and learning about the (very) basic physics of the voicing hole.  Additionally I’ve played wind instruments for the last 13 years, and know how to work a tuner.  Despite the videos and tutorials, the first time I tried to make an ocarina, I had no skills in using clay.  Fortunately, the people at the craft center when I went were kind enough to explain some of the basics of working with clay.

Goal
I’m making this for myself, but want to try to make a smaller ocarina.  I’ve typically made much larger ones which I’ve found are somewhat less finicky to get to make a sound.
Umbrella Plan

  • Finances:  All the blocks of clay at the student center are about 15$.  Everything else involved in the craft is free.
  • Materials: I went with a more grey type of clay.  They had several to choose from and I didn’t have great experiences with the brown or reddish clays, but had used the grey successfully before.
  • Skills:  I know how to use the tools that are below, as I’ve used them at the craft center for this specific purpose.  I know how to tune an ocarina basically, and very well with a tuner present.  I don’t really know how to make a wooden ocarina, so I’m going to be working on a clay one.

Begin Crystalization/Decisions
First I need to decide what tools I’ll use.  I pick out some of the clay tools, then decide upon which pre-made mould ( an egg shaped lump of hardened clay that will form the inside of the ocarina) I want to use.

The clay is cut from the block, then kneaded to get rid of the bubbles and flattened with a rolling pin. Then I cut the clay and form it around the mould I’ve made. If the clay doesn’t feel even around the mould, I’ll add more. Next is shaving off more clay to make it less lumpy.  It’s always difficult to determine when to stop–the more I shave off, the less structurally sound the end product will be (and the harder the next steps will be) the less I shave off, the more uneven the ocarina is, which can cause problems in firing.

Once I’ve got a basic mould set up, I cut the ocarina in two, and decide upon a “bottom” half.  I construct and attach the mouthpiece.  If the hole for the mouthpiece isn’t big enough, I have to make it bigger and recut.  If the hole cut for the mouthpiece is too big I have to add more clay. A small square hole is cut where the popsicle stick meets the shell.


The hardest part comes in making the wedge that splits the air from the mouthpiece to create the sound. This often takes at least half an hour of evaluating, making decisions about how to fix it, and proceeding from there. Often the sides will not be straight enough, or the actual wedge will need to be reformed, or realigned.

The last bit is putting the two halves together, sealing it, smoothing out the edges with more clay, and then cutting the finger holes. During this whole step the wedge will need to be realigned, reshaped, and sometimes the entire ocarina is unsalvageable.

 
Final Analysis.

Since this is just a simple ocarina for myself, whether or not it played was my final analysis. I wasn’t too interested in tuning it this time, as I’ll do that later once it’s hardened more.

Making a reed

Wednesday, January 30th, 2013

Making oboe reeds


When I was younger I played the oboe (I still can by the way) and an important part of the oboe is the reed.  A good reed can be the difference between a nice sound coming out of your oboe or a bad one. It can also make a difference in what way you need to play the oboe. A thick reed requires more blowing strength from the player then a thinner reed. However, the thickness of the reed has an influence on the sound but also the lifespan of the reed. One can say that a reed is therefore a very personal part of the musical instrument and that is also why many oboe players make their own reed. Truth be told, I haven’t done this in a very very long time but that is also the reason why I want to focus on this for my design challenge, to hopefully regain some of the knowledge I lost. I will analyze this practice using the Keller & Keller text. Keller and Keller quote Wertsch saying the following:


Our research focuses primarily on the interrelations of knowledge and action as individual phenomena, although the inclusion of individual action within a larger activity system requires that we can draw on both social and routine elements. From this perspective neither the human organism nor the external world is solely responsible for developing knowledge about the world (Wertsch, 1981, p. 38).


In a different publication by Janice E. Fournier called How a Creative “System” Learns: The Distributed Activity of Choreography, the author goes into Keller and Keller also implicitly referring to the quote above. Fournier states that most studies investigate how individuals or groups of individuals coordinate their activities in accomplishing routine tasks or solving well-defined problems. Keller and Keller however, as can be read in the quote, see practitioners engage in iterative processes of visualizing goals, planning a means for creating those goals in form and acting on the plan with a mind open to alterations and new ideas as the form evolves. In this creative system, activity is distributed across the practitioner and specific tools and structures in his environment (Fournier, 2012).

Thus, to discuss how a reed is being made, how I have made reeds is to discuss and analyze the creative system. So we need to know how activity is distributed across the practitioner and specific tools and structures in my environment. Knowledge is simultaneously a prerequisite and a consequence of action and action is like a prerequisite and a consequence of knowledge (Keller & Keller, 1994). One leading statement for me to get a grip of this analysis will be from Leont’ev stating that the internal mental order is continually transformed by external actions and their material constituents and results.


Prior Knowledge


To make an oboe reed prior knowledge is necessary. The first time I made a reed was during a workshop. The workshop lasted several weeks and was being taught by an oboe teacher and reed maker. The prior knowledge you need is not only about reed making but also about oboe. For one, this is because the reed has a specific function, it is necessary to play the oboe. Two, the reed needs to be personalized. Person A prefers a different reed than person B and thus you need knowledge about the instrument but also about the client. Usually you are your own client. Reeds are not made on a large scale and usually not for others. When you are a beginner at oboe playing you can buy reeds from your teacher. He or she has made the reeds, and luckily also knows you a bit so the reed is somewhat personalized to your needs.

During the workshop however I was confronted with a set of tools and materials I did not know well. Scrapers, specific kinds of wood, lines etc. I had years of playing the oboe though and also of using reeds so I had a mental image of what a reed was supposed to be like. Not only how it was supposed to look like, but also function and feel like. However, now I had to bend the wood, and make the cork. How far can I bend it? When does it break? These are especially points where material constituents and external actions (such as by my oboe teacher) interrelate with my internal mental order. A workshop is of course the perfect place for this. In a way a workshop is the place to question the internal and external, it is a place to experiment and learn.

A big part of making a reed is scraping. You need to scrape the cork but also the reed itself. Scrape too much and the cork might not fit and/or the reed becomes too weak. But scrape too little and it becomes too hard to play (and the cork still does not fit!). So here we have a constant evaluation in progress. A reciprocal process between crystallization and finalizing. My teacher would of course advice on what to do, but the teacher can only do so much. It almost becomes like an actor network, where all these actors play a role; the material, the teacher, the tool, you yourself. Human and non-human actors all playing their part in the ongoing process. Already we see a creative system where activity is distributed across the practitioner and specific tools (like the scraper, the wood etc.) and structures in his environment (such as the teacher).


Antideskilling:3D Wooden Puzzle Craft Kit

Monday, January 28th, 2013

3D Wooden Puzzle Craft Kit

Kit components (what we get from store):
wooden pieces, sand paper, instruction, glue

Procedure:
1. take wooden pieces out
2. make the wooden pieces smooth with sand paper
3. follow the instruction to assemble the pieces
4. fix it with glue

3D Wooden Puzzle Craft Kit Redesign

Kit components:
unfinished wooden pieces, sand paper, instruction, glue

And new components
saw, sanding sealer (a lacquer or other coating formulated to give better filling than the topcoat products), digital paint gun, paint (colors), rubbing compound, swirl mark remover, polishing compound

Wooden Piece

Rubbing Compound and Polishing Compound

Digital Paint Gun

Digital Paint Gun

Digital paint gun can do color mixing and teach people how to paint on wood. The gun contains a couple of different paint colors inside and it will mix them to give the color that people want. The proportion of the colors will be shown on the screen of the gun so people learn how to match such color. As people painting, the camera on the gun will monitor their work and give people suggestion if some paint problem is detected. Mixed reality technology will be used here to point the problem spot to people so they can get it in an easy way.

Redesigned Procedure:
1. cut the wooden pieces with saw
2. make the wood pieces smooth with sand paper
3. make the wood pieces smoother with sanding sealer
4. paint with digital paint gun and let the color settle down
5. put rubbing compound and swirl mark remover
6. use polishing compound
7. follow the instruction to assemble the pieces
8. fix it with glue

Anti-deskill:
By playing with new craft kit, people learn the basic procedures and skills to make wooden craft.

Antideskilling: A whittler’s touchstone

Wednesday, January 23rd, 2013

Makers have more opportunities than ever before to put together almost anything they can dream of from a kit of parts. They assemble these pre-fabricated parts and components from directions, and ultimately have a working product. But is it a craft?

This project works in the tradition of such kits, providing directions and parts for the maker to assemble. The goal is to whittle an egg from a piece of wood. Wiring electrical components creates the feedback mechanism that steers whittlers toward an outcome. But unlike kits ordered from Sparkfun, Maker:Shed and other DIY supply shops, assembling the electrical components does not itself constitute a finished product.The maker must exercise patience and manual skill manipulating wooden materials with a knife.

The hope here is that digital components mentor amateur crafters toward a tacit understanding of the raw materials they manipulate with tools. Whittling is a simple handicraft amenable to this sort of digital intervention. Newcomers to whittling usually undertake this simple project first: fashion an egg from a block of wood. The task reveals the responsiveness of wood to the force of a knife. The wood grain, the choice between a push or a pull stroke, and the wood’s hardness all have to be negotiated in this beginner’s project. The use of specialized tools is a contentious point among whittlers. Purists consider a sharp pocket knife the only suitable option since anything specialized reconstitute the practice as carving. They also reject the use of stainless steel knives, since they cannot be suitably sharpened.

Whittling is undertaken by individuals slowly passing time. As such it resists ever being subsumed by mechanization since this would remove whittling’s essential context. Master whittlers who find faces in fallen branches will never be “workers” in Rissati’s sense, since the spontaneous discovery of form with natural materials is never “simply labor produced by the non-creative hand.” Craftsmanship “depends on the judgement, dexterity and care which the maker exercises as he works.” This kit helps the amateur acquire a sensitivity to the relationship between material, tool and form, so that better judgement, dexterity and care can be applied to more ambitious projects in the future.

The Kit:


A block of balsa wood has a hollow core. Into this core we’ll insert a dowel with 3 notches on three facets, for a total of 9 notches. Into these notches, the maker will affix small and inexpensive hall effect sensors. These sensors act as proximity sensors for ferrous materials. When the steel (an iron alloy) knife comes within a calibrated distance to the sensor from outside the wood, the sensor will trigger a small vibration actuator that shakes the egg. This tells the whittler that the cut in this particular area is deep enough, and that it is time to move on to another area to shape the egg. Once the egg has been fashioned on all sides, the core can be removed. The end product contains no electronic parts. The wiring acts as tutor, and provides feedback to guide the amateur’s exploration.

Full Stage Multiplayer Theremin

Wednesday, October 10th, 2012

1. Set up Processing application that maps sound pitch, volume, pan, and timing to motion detection (video camera delta will work for this).

2. Point the camera at the performance.

3. Start the Processing application.

4. Offer the resulting real-time audio as a new way to experience the show’s fast and slow bursts, follow shifts of energy locations on-stage, and types of movements by dancers.

Iteration would be required to achieve the types of tones and timings desired by the team. The present pre-alpha version of the software is for demonstration purposes only, and at this time mostly reflects that tone, pitch, and amplitude can be made a function of total motion detected (frame differences) within different areas of the camera.

Experimentation with how to “play” any given motion-to-audio mapping could promote different types of exploratory movements. In addition to providing an optional audio dimension to the movements, conceivably with enough improvement this design could provide a way for visitors with severe vision disabilities to enjoy the pacing and stage action of the performance – roughly similar in principle to the aquarium research across the hall from DWIG.

Guide: Text Page

Guide: Images Page

Library Interventions

Wednesday, October 3rd, 2012

Ecological System: Georgia Tech Library, “performance zone” (tables on the first floor near where there used to be a coffeeshop, across the glass)

Actors/Entities:
• Students that have lots of work to do (majority here are male, average age ~21)
• Laptops, turned on, most presumably with internet connection
• Security camera pointed at the big screen+speakers presentation system

Nonentities:
• 13 tables
• Outlets all along the wall
• Outlets hanging from the ceiling in 4 places
• About 3 dozen chairs
• Vending machine drinks, snacks
• Pens, pencils, paper
• Presentation screen with large screen and speakers
• 5 overhead hanging speakers

Notable Conditions:
• Consistently chilly air
• Consistently bright fluorescent tube lighting
• A looming sense of focus and/or despair

Performance Interventions:
1. The aim of this intervention is to affect relations between entities, by getting strangers to sit at the same table. A simple Arduino device is attached to the underside of the centermost table, with switches wired to the edges where nearby tables can be pulled to hold the switches in. When any switches depress, a signal notifies the performer to return to this area and return the tables to formation.

2. The aim of this intervention is to confirm that the ecological system’s strength in asserting its identity as an entity having its own PRA. The performer’s task in this case is to see whether he or she will be rejected by the space, rather than accepted by the people in it. This is done by doing something that the people would not object to, if it were not being done in this ecological system. The performer brings a laptop with an obviously 2-player game, classic Street Fighter 2, plus 2 USB gamepads. Volume turned off (blaring audio annoyance would be too obviously a violation), the performer plays the game in single player, until A New Challenger Approaches. They play a round or a few, but when that person leaves to work, the person continues playing, with controller 2 laying out again as bait. If/when someone asks the performer to leave, the space has asserted its identity as separate from that of its individual entities.

3. The aim of this intervention is to extend the ecological system by scattering its entities into alternative contexts. As set up, the performer creates a php file that will recommend another specific study location on campus, selected at random, and direct the student to go study there. Ideally, some navigation information or map should be provided as well. Below that should be links to these articles from LifeHacker and Lawyerist, which both suggest that changing study/work location yields improved results. A QR code directing to this URL can then be printed and taped to the corner of each table in the room. If people get curious to check the QR Code, they may be persuaded to try studying at one of the other recommended locations. The performers role in this case is to hang out working at the table, periodically taking pictures of the QR code then leaving for a bit, later returning and repeating, to entice people to try it. If this proves effective, it may help those students discover a new favorite study location to alternate, and it also makes this otherwise popular section less crowded, creating a partial vacuum which may inspire more students to wander over and try it (first studying there, then being coaxed into trying some other location as well).

Guide: Text Page

Guide: Images Page

The Otamatone Oracle

Monday, September 24th, 2012

The Otamatone is a device art object by the Japanese artist Mazwa Denki. It is a musical-note shaped singing toy which requires two hands to be played: one hand controls the pitch by sliding one finger up and down the stem, the other holds and squeezes the head.

The design of this device art object is already making a statement for the connection between musical expressivity and the communication features inscribed in it. The Otamatone Oracle is celebrating and consequently extending this idea, by offering a translation of the predictions made using this device.

The interactor is asked to express his current feelings and personality by using this very easy to handle and highly expressive musical device. Since the Otamatone is hacked and hooked up to an Arduino board, the way in which it’s played generates a poem. It becomes a digital oracle between oral and written poetry.

This way the user does not only get a reason to become a musican, but also generates a personal piece of literature, which is in direct relationship with his personality and expressivity. The predictions will be on display together with the recorded music for the time the Otamatone Oracle is in town. And yes it is possible to write books by consulting the Otamatone Oracle.


Examples of poems generated by the Otamatone Oracle:


“Oh how I love you squealing

It sounds so utterly appealing

Make I stop before I drop”


“Silence

American

Juice

Migrane

Opera

Vibrato

ducks

sonar

flatline

two”


“Food

Ghost

Lives My socks

Socks

Sucks!

Holy Tomatoes

in grocery town

hippy Flopping Berger

Benz”


“casserole cows are

being strangled

by the ducks that

hide in the trough!

who’s laughting

now? silence”


“problems help

snake charmer

menace

ambulance

neerst monitor”


“O ili

yusuuuu

veally

veally

veally

iiiiiiiiii

v

v

it ate

tate

tate

t tt t

e

e”

Shirt Slash

Wednesday, September 19th, 2012

Our third challenge was for us to find a way to use digital media to propagate play as an expressive form. This had to be built atop a common skill or play property, and produce something in the process.

One very common skill, which quickly takes on play qualities when performed within the safe boundaries of friends, is the ability to balance attack and defense. To strike while minimizing our own vulnerability is at the root of our survival reflexes, a skill so ordinary that it can be observed in untrained animals. This behavior occurs when neither fight nor flight wins out in full, and a person or animal is then pressed to engage in both at once.

For humans, tools are employed to increase the effectiveness of attack or to reduce the need to defend. Such tools include, even among ancient and primitive humankind: stones, knives, spears, and swords.

Truly inflicting bodily injury is certainly not a playful activity. Instead, I’m focusing on sparring, by substituting fabric markers in the place of weapons, and competing to mark up one another’s t-shirts.

The game’s intersection with digital is in how the scoring occurs. A simple Processing application takes a before and after photo of each player facing the camera, then compares the end shots to the beginning versions to highlight changes made by marker contact. The number and thickness of lines drawn to each shirt can then be totaled for each player as the opposite partner’s score. The program is then able to declare a winner based on which player’s score is greater.

In the process, a one-of-a-kind artifact is created: a t-shirt design dynamically generated by the successful strikes of our playful sparring partners. The length, number, and intensity of strokes on each player’s shirt speaks to the battles they have been through.

Detailed instructions are available on the Guide: Text Page.

For more photos and details check out the Guide: Images Page.

Flux Processing Unit (FPU)

Thursday, September 13th, 2012

There is one big problem with notebooks: they are boring! Computers always used to be challenging devices that ask for creative problem solving and a high sensibility for their dysfunctionality. Today notebooks tend to become more and more this black boxes, emphasizing consume and standardization. It gets hard and hard to imagine them in any different way. Thankfully here comes the Flux Processing Unit (FPU)! The FPU is a hyper-intelligent, charismatic and fun personal computer that has a lifespan inscribed in his very design. The longer the interactor is working or playing with the FPU, the more its falling apart, both on the hardware and software side. It is the perfect challenge for every true hardcore nerd. We are bored of clean and highly subjective computers, we need to get back to the possibility of thinking about their design from different perspectives. The FPU is the perfect tool to emphasize the optimization throughout all layers of society.

The FPU is metadesign for everyone. It is intented to be a giving away for cheap for prototyping purposes and thus allows computer manufactures to monitor the needs and utilizes the creativity of their customers at the same time. It is sold as a living creature, both the hardware and software are falling apart with time. The challenge for the interactor is thus to develop procedurally strategies for overcoming the FPUs collapse.

The FPU comes with 6 separate touch-stereoskopic-high-res-screens and tons of undefined buttons and other input devises. Each of the screens and input devises are detach- and reattachable. During the lifespan of the FPU the interactor will be forced with making a decision: Loosing usability and comfort or rearranging the parts and thus giving it more time. It is likely that most interactors will end up rearranging the parts in ways that make sense for them on the long run, but the FPU is also forcing them to take some risks, especially when they run out of convenient solutions. Additionally it is constantly communicating with all the other FPUs on the planet. There is also a extra feature available, which allows to expant the lifetime of the devise by petting it. This way the interactor has the opportunity to develop a very personally relationship to its FPU.

Every FPU comes with Flux Linux Sickness (FLS), the only operating system compatible with the FPU. This Linux participation is following the lifespan idea on the software side. Here the operation system, with all attached programs, also begins to fall apart and it is up to the interactor to develop procedurally solutions in order to maintain the lifespan of its FPU. One of the first elements that is going to die is the mouse. Thus the first task of the interactor will be to prohibit the mouse from dying. In order to do so he is playfully forced to redesign it.

Additionally every FPU is equipped with the Flux Communication Annoyance (FCA). The FCA makes sure that all FPUs on the planet are constantly communicating and thus allowing for cloud-based computation. If the interactor is maintaining a healthy, and thus very well designed FPU, he might also acquire the right to develop and communicate his own procedurally developed design challenges to other FPUs. The FCA is not only a fun way of annoying each other, it also makes sure that not every single interactor is developing his own solutions for himself, but that the community is procedurally co-developing the future of computation. Thus every single FPU becomes not only a symbol of merging design and user time, but also mirroring the design ideas and challenges of all FPU interactors all over the planet, across time and space, nationalities and social class. 

Arduino Pinball Kit

Wednesday, September 12th, 2012

For this week, we were challenged to re-imagine a way for user and design time to get closer together on a digital device, by enabling users to redesign the object. Plenty of opportunities for user redesign come to mind for software, in which accessible tools can be designed for arbitrary levels of content creation and experience customization, but in line with the challenge’s specification of “device” I aimed to come up with a hardware example.

The overall concept I pitched was that of a modular pinball table, wired with an Arduino microcontroller to enable customization of playfield scoring and gating rules.

I built a crude, playable concept model to illustrate the intended scale and form:

Playable, though all-analog, concept model

The low half of the table is fixed firmly to the table, so the inlane/outlane divider, slingshots (triangles above the flippers), flippers, and plunger are positioned in their standard arrangement. The top half of the playfield however is perforated with holes, each providing a potential connection point for a bumper, spinner, stand-up target, ramp, or other playfield element. In the fully wired version, rather than using small holes with wires poking through, a more secure and flush electrical connection might be established by instead using screw sockets, filled with plugs for those not in use. Such a design would also enable arbitrary positioning of lights in/under the playfield, to also be orchestrated via the Arduino controller.

Guide: Text Page

Guide: Images Page

Evolving Design

Wednesday, September 12th, 2012

Setup
The stated goal for this week’s design challenge is to think of a way to push design-time and use-time closer together in a digital device. This is based off Maceli’s Human Actor’s paper discussing meta-design. In my preliminary ponderings about this concept some thoughts rose up. First, that in other fields (like systems engineering) the processes of design and use can be thought of as a control system. Control systems are functions that take a stated goal (rotate the car 15 degrees left), produce an output in the real world (car’s new position is 13.8 degrees left), and (sometimes) receive feedback to bring the desired and the actual closer together (car only moved 13.8, move an additional 1.2 degrees). Generally the faster a control system can receive and process feedback, the more perfectly the system functions.

Traditional design could be viewed as a very poor control system with little feedback. A designer creates with a goal in mind (a perfectly comfortable chair), and the user deals with what comes out (this chair feels alright). More robust design-use systems feature closer feedback with user-testing and use-analysis for more iterative design process. As we shrink the feedback time and make our designerly control system more responsive, we get closer to this design challenge of pushing design and use time closer together. Let’s imagine a chair made of an even more perfect version of Hiroshi Ishii’s posit, “Perfect Red” (a digitally manipulable matter which allowed one to perform CAD functions on the object itself), which perfectly understood a users thoughts, words and actions. A user could receive a blank, “Perfect Chair,” sit in it, and command it physically, verbally, and emotionally until the user was perfectly content. This, I believe would present a concept of design and use being as close together as possible. The tightest possible feedback leading to beautifully responsive design.

A problem with this perfect control system, is that although the chair can give us whatever we want, we don’t always know what that is. Omnipotence kills innovation. One might not ever realize the benefits of a cup-holder in one’s “perfect chair.” The thought of splitting off a “perfect Ottoman” might be one of those things that doesn’t happen until you see it at a neighbor’s house. “What a great idea” one might say when seeing a fresh new type of “perfect chair” in an airport lobby. Some of these people with fresh new chair ideas might start receiving commisions to come up with their designs. Soon we are back to splitting apart design and use-time once more!

This is why mutations and arbitrary changes are so important in nature. This is why we have sex. Something can be optimized in its own niche, but without new or outside information, it cannot adapt. My answer to the design challenge attempts to push together design and use time closer, but only to a point where the design can still be meditated on, played with, and innovated.

Evolving Design

I propose objects that are responsive to their users, and the innovations of similar objects, though only in an indirect manner. The object’s shape and functionality will change according to evolutionary principles.

Rules

  • Everyone’s device starts out the same.
  • Everyone’s device possesses a code describing its current state and configuration (“genes”). This code can feature markup describing higher level functionality and descriptions (“alleles”).
  • Every night the device “dies,” automatically reconfigures itself, and is reborn as its own child. This is like asexual reproduction but the number of resulting objects remains the same.
  • The child’s genes are taken in some part from the parent device and a smaller amount are taken randomly (“mutation”).
  • The genes passed on are determined by a fitness function which results from how the user interacts with the device.
  • Two devices can reproduce sexually by leaving them  in close proximity overnight. This results in each splitting the code normally passed on to their singular children, but for each other’s child


An alternate idea I had was for Lamarkian Evolving Furniture. In this case the main difference would be that physical changes that happen to the device-creature, are passed on through its genes to the next subject. That is, you could beat your chair into a new shape, and its “child” would show signs of your previous physical manipulations.

Copy Jockey (CJ)

Wednesday, September 5th, 2012

Copy Machines can be more then just a mere productive tools to work with. They have a distinct aesthetic and an own performative aspect to them. Everyone that worked with Copy Machines for a longer time, knows about their rhythmical, peaceful conditioning and there potential to become tools of Zen practice.

However there is one big problem: Copy Machines are usually placed in ugly corners, which are uncomfortable and therefore tend to force their interactor into social isolation. I propose to stage a party centered around two Copy Machines in order to overcome their bad reputation.

By using two Copy Machines at once, it becomes quite a fun and meditative challenge to be as much productive as possible. The goal of the interactor operating this two machines at the same time, the CJ, should be to merge with the electro-mechanical apparatus. His movements become dance, the synchronized sound and light of the machines shell embrace the whole scenery.

By hacking Copy Machines in the first place, the CJ may make sure that the rhythm of movement, sound and light is synchronized with the music and lightning of the party. Therefore a CJ performance is not only a celebration of Sisyphus task in an postindustrial age, but it also stages the gap between work and play. It aims to opens up new perspectives on boring work-benches and provides a breading herd for people to develop more creative and efficient ways to deal with them.


Facecard Friends

Wednesday, September 5th, 2012

The notion of “messing about” from Papert (1998) and Hawkins (1965) is about embracing unintended effects during crafting as a source of learning and ideation. This helps interactors “overcome the ‘rigid style of work’ typically associated with [electronics]” (Ratto 2011).

Another type of object that we commonly associate with a rigid style of work, especially as adults, is everyday paper. In this case I’m specifically setting my sights on index cards, which for me evoke memories of studying flash cards, browsing library card catalogs, preparing bibliography entries, and generally taking care of schoolwork or business the old fashioned way. For my concept today, I’m be introducing a way to mess about with index cards to, hopefully, help us overcome the rigid style of work typically associated with office/school paper products.

There’s another theory that we need to account for, however: in writing about knitting for her MA Thesis, Betsy Greer (2004) highlights how, “A space for conversation opens up somehow, with this simple act.” Greer’s words immediately before that statement better explains the meaning:

“‘[Knitting] allows for people to come and talk to you without feeling awkward.’ …it’s true. It’s much easier to go up and talk to someone who is holding a baby or playing with a puppy because everyone agrees that they’re both cute. You don’t look like you’re hitting on them or anything. It’s safe. The similar reaction happens when you have your knitting.”

We don’t just need to rethink our relationship to paper supplies. We need a conversation starter.

Example designs

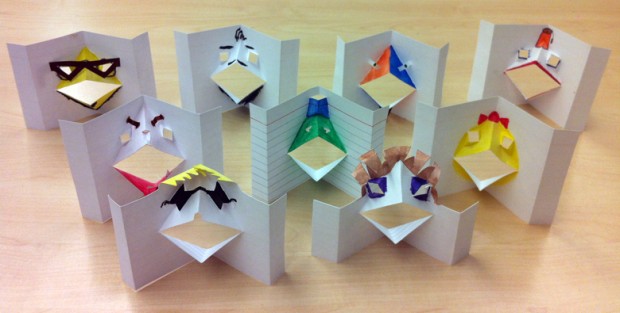
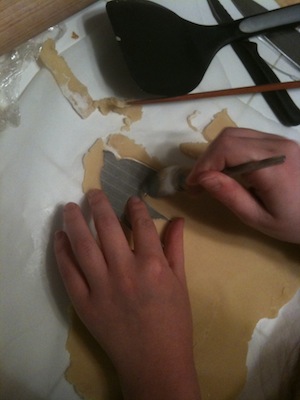
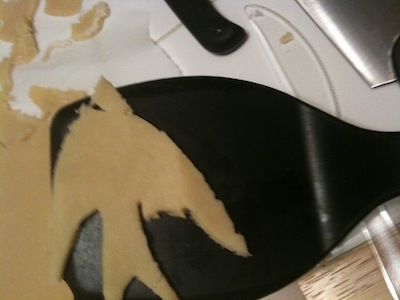
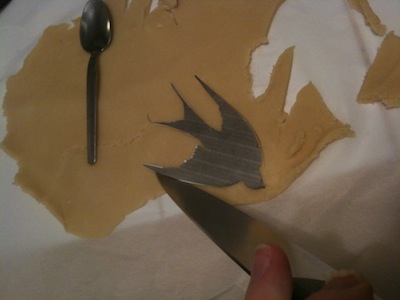
There are so many ways to design and decorate your Facecards

I’m pleased to report that while working on these crafts, within a period of only a few hours I had nearly a half dozen classmates stop to talk and ask me what I was up to. After I finished crafting, and just had them sitting around on my desk, I still drew in an unusual amount of attention and discussion with acquaintances that I ordinarily only speak with at most a few times each semester.

I arrived at this concept after discarding a multiplayer electronic game idea – for fear that competition would get in the way of casual conversation – and a stairstep paper folding maze I made multiple prototypes for. Inspired by Greer’s ideas, I was searching for a solution that fit as many of these criteria as possible from the domain of hobbyist knitting:

  • Non-competitive. There’s no winner or loser. People of varying skill can all participate together without anyone feeling shut down by it.

  • Range for skill. More experienced participants are able to challenge themselves, while people newer to the activity are able to still complete projects and achieve output meaningful to other people. This also means that someone practicing the skill has room to improve at it, achieving new and different results with time.

  • One artifact produced per individual, ready to be saved or gifted. This untangling from one another’s production makes it easier for the group to be flexible, welcoming in new members at any time and experience level. Everyone can be at different phases on projects of different complexity. This also works better for fitting the task into everyday life, since participants can miss or come late to a meeting and not be “behind” thereafter. This quality reduces stress and logistical overhead.

  • Conversation enabler while making. The craft needs to occupy enough of each maker’s attention to take pressure off the intensity of eye contact or meeting just to talk, while leaving enough attention free to engage in full and meaningful conversation with others.

  • Conversation starter when done. Like the knitting needles hanging out of Greer’s handbag, the craft needs to be something which can spark conversation with others even when it’s not being actively done.

  • The goal of each artifact can be made open or kept personal. Everyone’s producing a unique artifact, which they are welcome to either share details of with the group (ex. “Oh, this is for my nephew Jacob”) or keep those intentions to themselves (“Today I’m making a scarf”). The separation between artifact and who it is being made for is left ambiguous, in a way that say, writing letters or making gift cards, would easily reveal.

  • Not pretentious. These artifacts make no claim to be high art, or aren’t concerned with conceptual and theoretical posturing. They get made primarily because they are enjoyable or relaxing to make, and they get saved or shared primarily because everyday people like the results.

  • Within anyone’s price range. This isn’t an activity just for people with major financial means. It’s an activity for anyone and everyone.

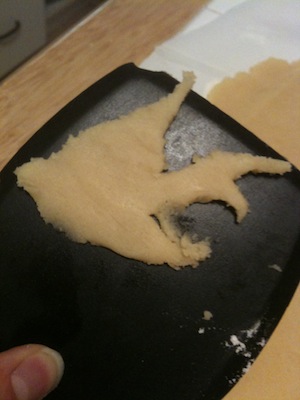
In the mid-1990’s, I learned basic paper pop-up craft from Paul Jackon’s The Pop-Up Book: Step-by-Step Instructions for Creating Over 100 Original Paper Projects. One of the simplest designs included, which produced appealing and playful output from comparatively little effort or skill, was a frog face that opens and closes its eyes and mouth as a page is folded or unfolded. Since this is so simple to learn and do, and creates room for skilled customization through painting or more advanced cutting, it seemed to me a suitable craft to adapt and elaborate upon.

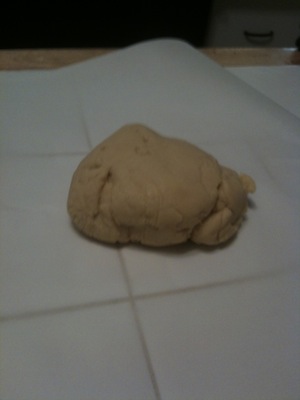
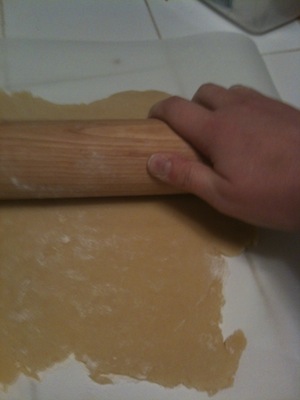
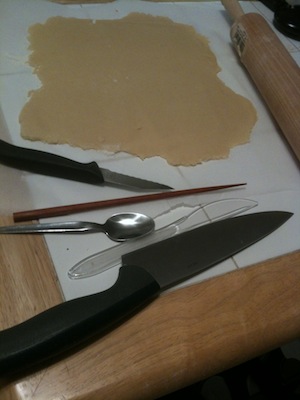
I’ve incorporated watercolor paints as the decoration method of choice, in part because for many of us it evokes elementary art class, which was one of our first and few courses in life where freely socializing while working with our hands was the norm. As a minor modification to the folding, I added side flaps, which makes it easier to open and close the mouth to play with the artifact like a puppet. I changed the plans from full-size pages to index cards because they’re stronger than regular paper–so they hold up better to the watercolors–plus they’re small enough to be easily stored, and it’s possible to buy hundreds of them for only a few dollars. Since this cutting pattern is simple enough to work with scissors, no X-Acto blade is really needed, conceivably hundreds of these can be made for only $5-$10 spent on watercolors and index cards.

Lastly, because the final artifacts lay flat when finished, it would be trivial to scan these, at which point they could be e-mailed as patterns, shared via a database, or textured to a 3D model in-browser (for previewing customization ideas by others… or even for mapping on a character within a game). People could share their Facecard Friend designs not only with the people around them, but with the whole world, creating a potential audience for those interested in taking Facecard crafting to the next level.

For more information, here are my two one-sided pages:

Guide: Text Page

Guide: Images Page