Archive for January, 2013

Third Challenge

Thursday, January 31st, 2013

Now that you have documented a practice as a logical action and planning breakdown we turn to the experiential parts of it. Look at the breakdown of the practice, identify a key moment that exemplifies the “feel” for this practice. It should answer the question of what is the most experience-based (including sensual, illogical, personal, joyful, painful) part of this practice? Design something that recreates the experiential quality of this moment.
It does not have to use the practice (e.g. if you want to describe the feeling of wood fibers you might do that with woolen threads) but should reflect the chosen key moment.

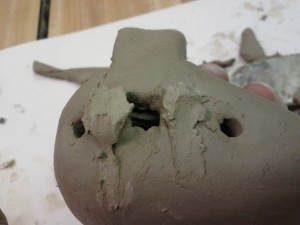
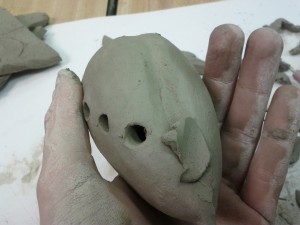
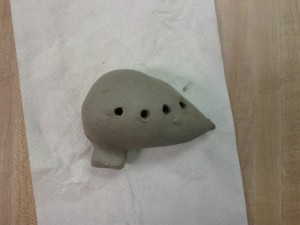
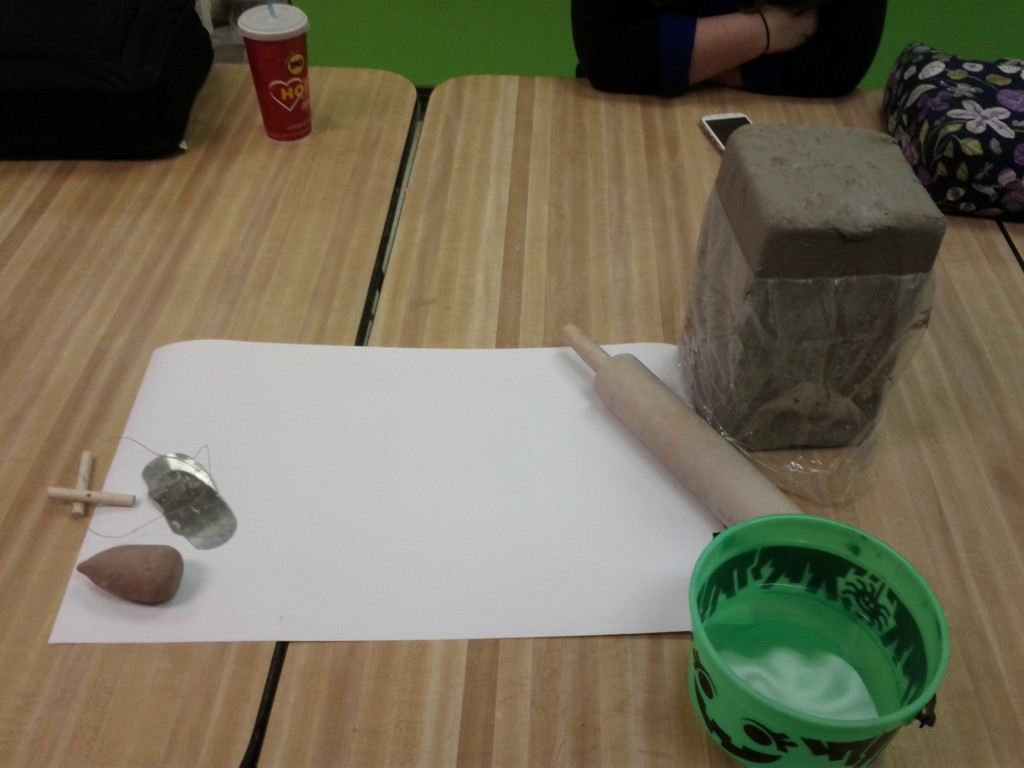
Process of making an Ocarina.

Wednesday, January 30th, 2013

One day at around three in the morning I decided I’d learn how to make an ocarina.  After spending a few hours reading about how to make one, I went to the Georgia Tech craft center.  Since then I’ve made several, but have only fired and tuned a few, due to the enormous amount of time it takes to tune them.


Cultural Craft
An ocarina is a wind instrument that uses both hands and a fingering system to play different notes.  Hand-made ocarinas are typically made out of clay or wood, and machine made ones are typically made with plastic.  Wooden ocarinas are typically shapped in a rectangular fashion, whereas the clay one I made are typically shaped like an egg with an attached mouthpiece.
 
Prior Knowledge
I know the general shape of a clay ocarina, and I’ve made a couple before.  I learned this from watching youtube videos, reading tutorials, and learning about the (very) basic physics of the voicing hole.  Additionally I’ve played wind instruments for the last 13 years, and know how to work a tuner.  Despite the videos and tutorials, the first time I tried to make an ocarina, I had no skills in using clay.  Fortunately, the people at the craft center when I went were kind enough to explain some of the basics of working with clay.

Goal
I’m making this for myself, but want to try to make a smaller ocarina.  I’ve typically made much larger ones which I’ve found are somewhat less finicky to get to make a sound.
Umbrella Plan

  • Finances:  All the blocks of clay at the student center are about 15$.  Everything else involved in the craft is free.
  • Materials: I went with a more grey type of clay.  They had several to choose from and I didn’t have great experiences with the brown or reddish clays, but had used the grey successfully before.
  • Skills:  I know how to use the tools that are below, as I’ve used them at the craft center for this specific purpose.  I know how to tune an ocarina basically, and very well with a tuner present.  I don’t really know how to make a wooden ocarina, so I’m going to be working on a clay one.

Begin Crystalization/Decisions
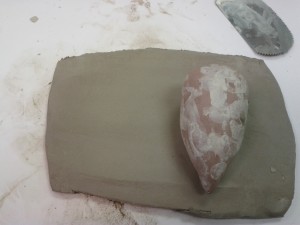
First I need to decide what tools I’ll use.  I pick out some of the clay tools, then decide upon which pre-made mould ( an egg shaped lump of hardened clay that will form the inside of the ocarina) I want to use.

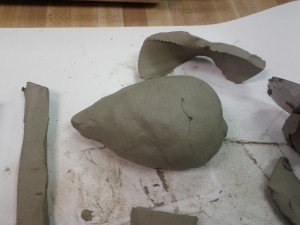
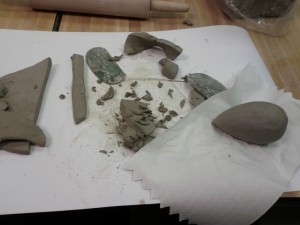
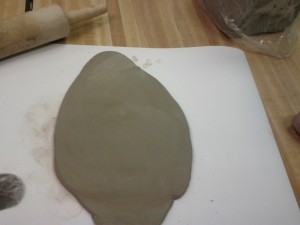
The clay is cut from the block, then kneaded to get rid of the bubbles and flattened with a rolling pin. Then I cut the clay and form it around the mould I’ve made. If the clay doesn’t feel even around the mould, I’ll add more. Next is shaving off more clay to make it less lumpy.  It’s always difficult to determine when to stop–the more I shave off, the less structurally sound the end product will be (and the harder the next steps will be) the less I shave off, the more uneven the ocarina is, which can cause problems in firing.

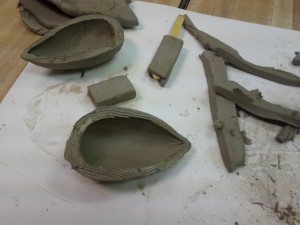
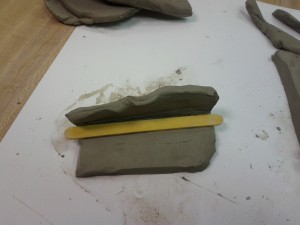
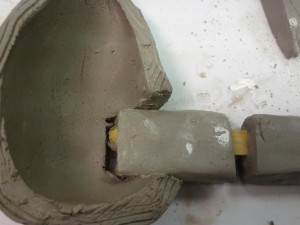
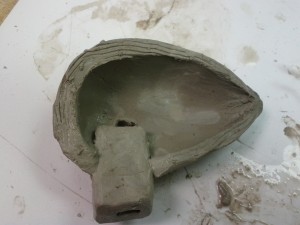
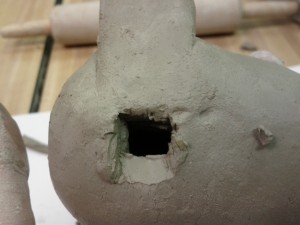
Once I’ve got a basic mould set up, I cut the ocarina in two, and decide upon a “bottom” half.  I construct and attach the mouthpiece.  If the hole for the mouthpiece isn’t big enough, I have to make it bigger and recut.  If the hole cut for the mouthpiece is too big I have to add more clay. A small square hole is cut where the popsicle stick meets the shell.


The hardest part comes in making the wedge that splits the air from the mouthpiece to create the sound. This often takes at least half an hour of evaluating, making decisions about how to fix it, and proceeding from there. Often the sides will not be straight enough, or the actual wedge will need to be reformed, or realigned.

The last bit is putting the two halves together, sealing it, smoothing out the edges with more clay, and then cutting the finger holes. During this whole step the wedge will need to be realigned, reshaped, and sometimes the entire ocarina is unsalvageable.

 
Final Analysis.

Since this is just a simple ocarina for myself, whether or not it played was my final analysis. I wasn’t too interested in tuning it this time, as I’ll do that later once it’s hardened more.

Making a reed

Wednesday, January 30th, 2013

Making oboe reeds


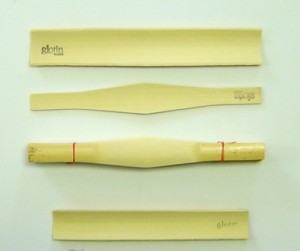
When I was younger I played the oboe (I still can by the way) and an important part of the oboe is the reed.  A good reed can be the difference between a nice sound coming out of your oboe or a bad one. It can also make a difference in what way you need to play the oboe. A thick reed requires more blowing strength from the player then a thinner reed. However, the thickness of the reed has an influence on the sound but also the lifespan of the reed. One can say that a reed is therefore a very personal part of the musical instrument and that is also why many oboe players make their own reed. Truth be told, I haven’t done this in a very very long time but that is also the reason why I want to focus on this for my design challenge, to hopefully regain some of the knowledge I lost. I will analyze this practice using the Keller & Keller text. Keller and Keller quote Wertsch saying the following:


Our research focuses primarily on the interrelations of knowledge and action as individual phenomena, although the inclusion of individual action within a larger activity system requires that we can draw on both social and routine elements. From this perspective neither the human organism nor the external world is solely responsible for developing knowledge about the world (Wertsch, 1981, p. 38).


In a different publication by Janice E. Fournier called How a Creative “System” Learns: The Distributed Activity of Choreography, the author goes into Keller and Keller also implicitly referring to the quote above. Fournier states that most studies investigate how individuals or groups of individuals coordinate their activities in accomplishing routine tasks or solving well-defined problems. Keller and Keller however, as can be read in the quote, see practitioners engage in iterative processes of visualizing goals, planning a means for creating those goals in form and acting on the plan with a mind open to alterations and new ideas as the form evolves. In this creative system, activity is distributed across the practitioner and specific tools and structures in his environment (Fournier, 2012).

Thus, to discuss how a reed is being made, how I have made reeds is to discuss and analyze the creative system. So we need to know how activity is distributed across the practitioner and specific tools and structures in my environment. Knowledge is simultaneously a prerequisite and a consequence of action and action is like a prerequisite and a consequence of knowledge (Keller & Keller, 1994). One leading statement for me to get a grip of this analysis will be from Leont’ev stating that the internal mental order is continually transformed by external actions and their material constituents and results.


Prior Knowledge


To make an oboe reed prior knowledge is necessary. The first time I made a reed was during a workshop. The workshop lasted several weeks and was being taught by an oboe teacher and reed maker. The prior knowledge you need is not only about reed making but also about oboe. For one, this is because the reed has a specific function, it is necessary to play the oboe. Two, the reed needs to be personalized. Person A prefers a different reed than person B and thus you need knowledge about the instrument but also about the client. Usually you are your own client. Reeds are not made on a large scale and usually not for others. When you are a beginner at oboe playing you can buy reeds from your teacher. He or she has made the reeds, and luckily also knows you a bit so the reed is somewhat personalized to your needs.

During the workshop however I was confronted with a set of tools and materials I did not know well. Scrapers, specific kinds of wood, lines etc. I had years of playing the oboe though and also of using reeds so I had a mental image of what a reed was supposed to be like. Not only how it was supposed to look like, but also function and feel like. However, now I had to bend the wood, and make the cork. How far can I bend it? When does it break? These are especially points where material constituents and external actions (such as by my oboe teacher) interrelate with my internal mental order. A workshop is of course the perfect place for this. In a way a workshop is the place to question the internal and external, it is a place to experiment and learn.

A big part of making a reed is scraping. You need to scrape the cork but also the reed itself. Scrape too much and the cork might not fit and/or the reed becomes too weak. But scrape too little and it becomes too hard to play (and the cork still does not fit!). So here we have a constant evaluation in progress. A reciprocal process between crystallization and finalizing. My teacher would of course advice on what to do, but the teacher can only do so much. It almost becomes like an actor network, where all these actors play a role; the material, the teacher, the tool, you yourself. Human and non-human actors all playing their part in the ongoing process. Already we see a creative system where activity is distributed across the practitioner and specific tools (like the scraper, the wood etc.) and structures in his environment (such as the teacher).


Analyzing the Processing of Screen Printing with a Stencil

Tuesday, January 29th, 2013

For a period of a few years in the mid-2000s, I made and sold craft clothing items. I wanted to learn about screen printing, but the need for emulsion and other chemicals seemed too complicated, so I started making my own stencils.

Cultural Considerations

The look of stencils is usually a bit rougher and more “amateur”-looking than screen prints. There are also some connotations with homemade activist clothing (i.e. the ubiquitous Che Guevara shirts) and posters, as well as graffiti. It’s a craft for people who don’t want their final object to look clean and professional and who want the ability to make a series of prints.


Prior Knowledge

Although I learned the basics of screen printing in a high school art class, I taught myself how to make stencil prints by using internet tutorials and trial and error.  I’ve never personally seen another person perform this process. People new to this process will inevitably make errors when designing the stencil because all of your “negative” space must be connected (in each single color process). Because I’ve done this many times, I’ve learned to carefully analyze my design before I start cutting because repairs are difficult.


Goal/Need

Since I no longer sell my crafts, my current goal would be to make myself a print or clothing item. I could choose my subject based on my personal likes or to express an opinion. If I don’t have to sell a print, the standards will be a bit lower, as I am probably more accepting of imperfections and mistakes if I’m not charging money.

Umbrella Plan

Finances: Finances are rarely a consideration, since stenciling is a very inexpensive craft, costing only a few dollars per item.

Materials: Paint (varies based on what is being printed), plastic, a good Exacto knife. These are supplies I keep on hand and are easily obtained.

Skills: The most important skill in this process is the design (considering positive and negative space) and the ability to make fine cuts through the plastic with the knife. The paint application requires almost no skill.

Standards: Although my own standards are probably not as high as the “craft community,” I would still attempt to create something that looked good enough to post/share online. Looking at the work of others and comments from the community would inform my perception of quality.

Begin crystallizing
Decisions: There isn’t a lot of room to change decisions once you start cutting, so the design process is critical.

The first step is decide on an image that will lend itself to a high-contrast (black and white) conversion. Because of applications like Photoshop, it’s easy to test out different images. I need to analyze if there are “floating” negative spaces that I would need to connect in my stencil. If I’ve chosen a good image and made the necessary alterations, the stenciling process will be much easier.
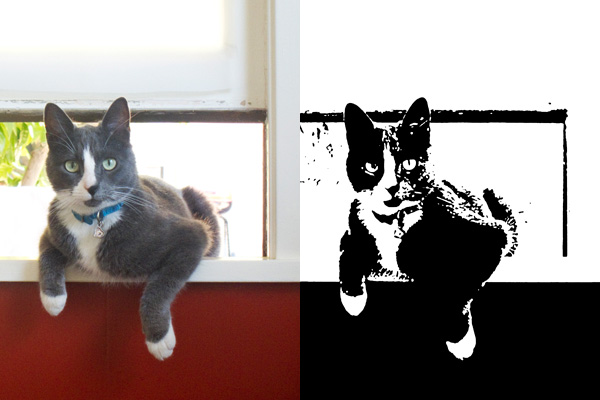
Next, I print my image and begin cutting out the black areas with my knife. This part of the process requires the most manual dexterity, but not much decision-making. I’ll need to make decisions if I’ve made a mistake in the design process (or if I’ve made a mistake with the knife). If there’s a “floating” area that I’ve missed or a weak connection, I’ll need to figure out and attempt a fix. I might need to start over with the design process.
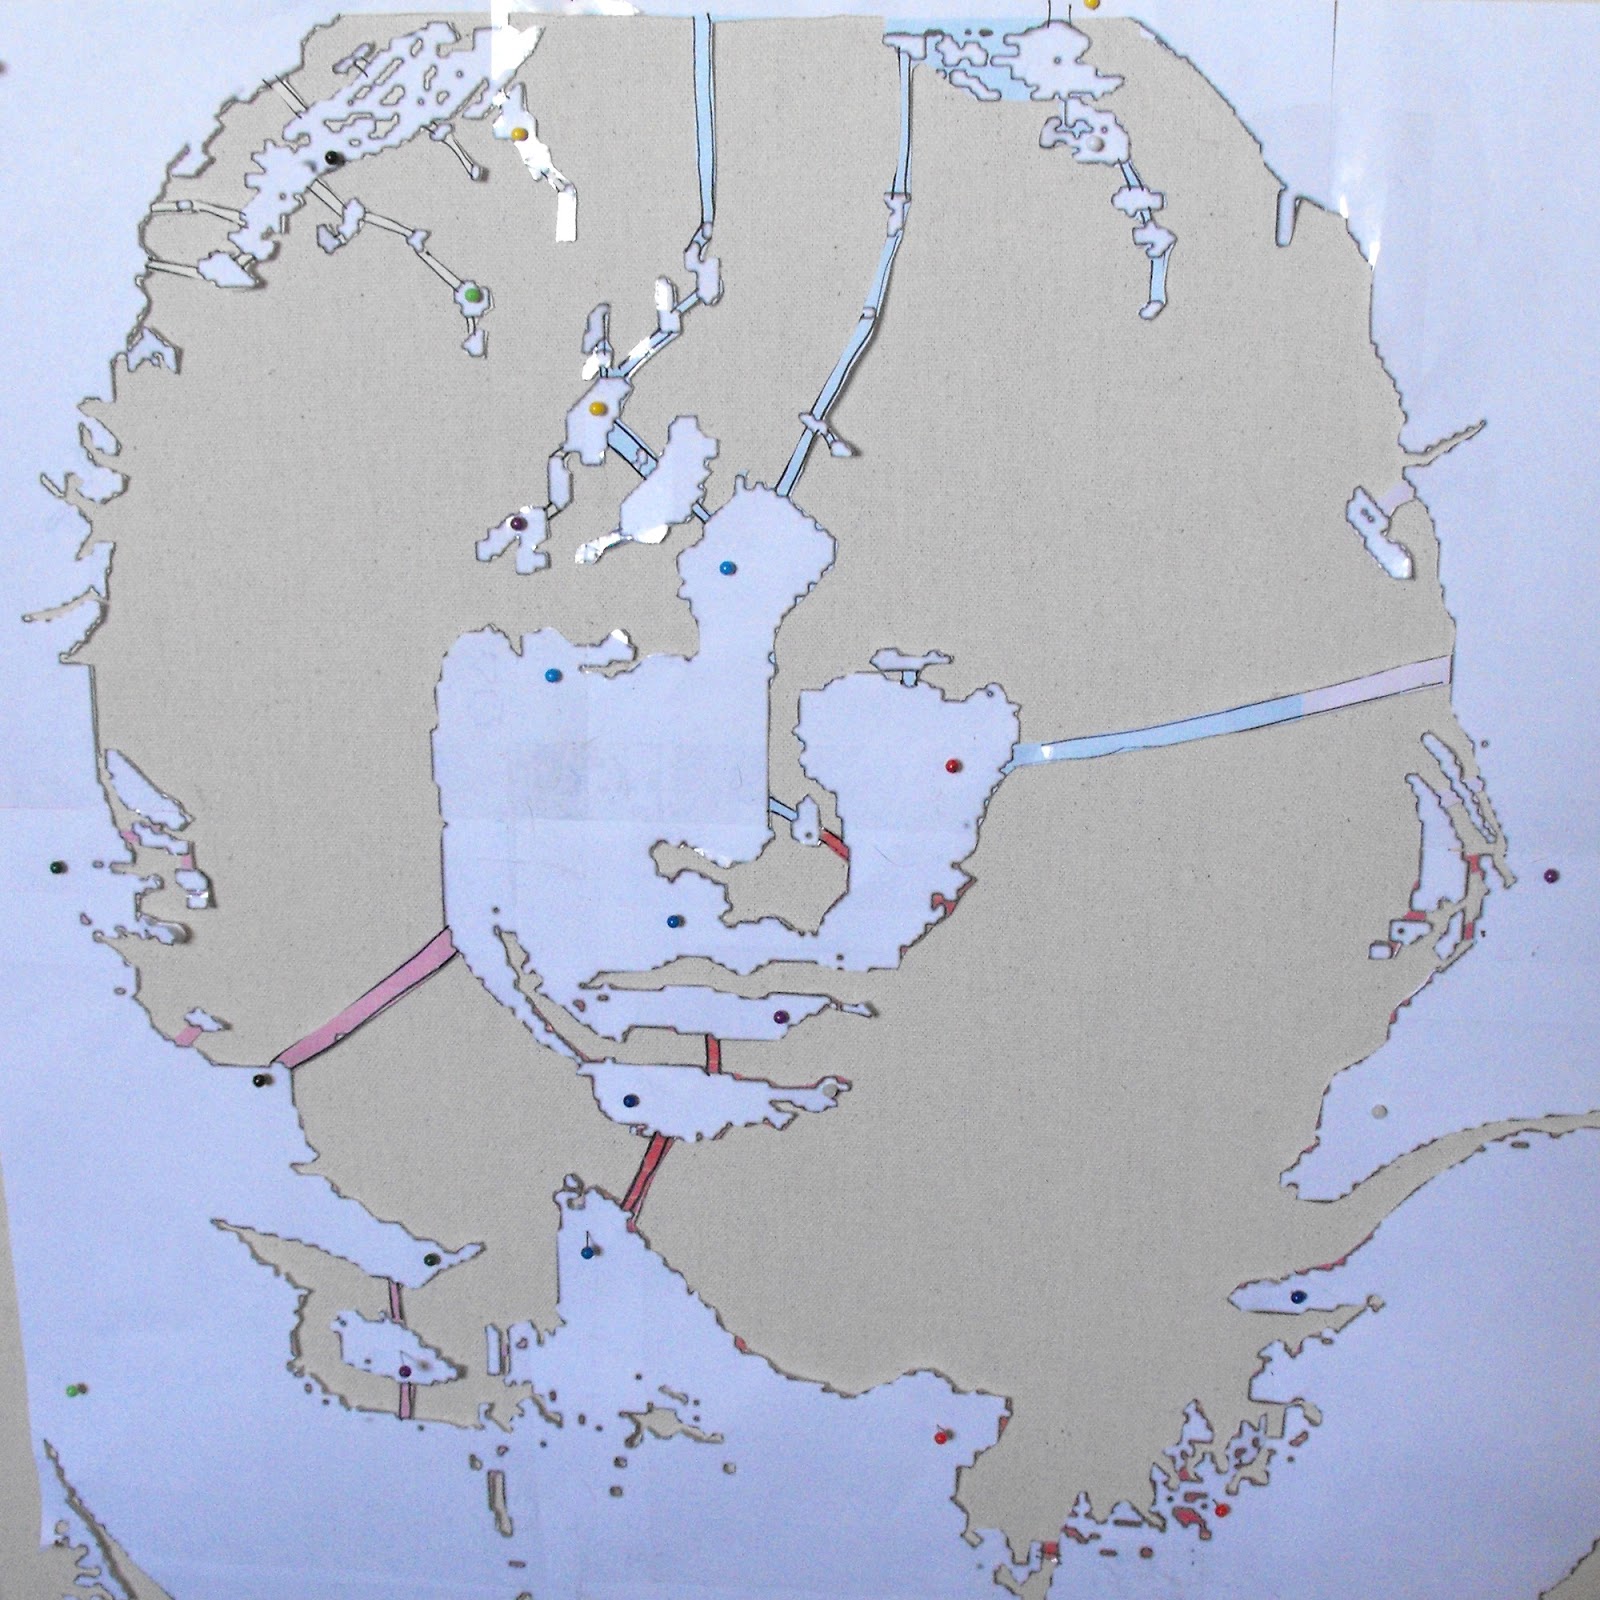
Evaluations:

There are usually two points of evaluation:

1. After the image has been printed (does it look right in black/white contrast? Is it still identifiable? Will it be too difficult to cut?)

2. After I’ve applied paint and removed the stencil. This is the last step of the process, so if I’m not happy with the way it looks, I need to determine if it’s a design flaw, a poorly cut stencil (i.e. jagged edges), or the paint seeping under the stencil. In this case I would use the “academic standards” to determine whether I will need to start again (from the beginning or from a later step in the process).

Final analysis/thing

Once I’ve completed the process until I’ve “passed” the evaluation, I’ll have a stenciled item (and a stencil that can be used many more times).
  

Anti-Deskilling – Improved Electronic kit

Tuesday, January 29th, 2013

Google, Wikipedia, Instructables… We tend to use our computer as a magic oracle that knows everything. By doing so, we may tend to give
it too much trust, while loosing a part of our critical thinking, and passively accetping its all mighty knowledge.

I propose to redesign a random electronic kit, but pretty badly prepared : no instruction, missing resistors or too many of them. To
counterbalance these complications, I suggest a radical approach : to empower even more the computer. It knows the instructions to build
the kit, but you need to convince it you’re worthy enough to get the next instruction by showing your technical skills, their improvement
and by building your intuitive understanding of the materials you are using.

Various levels of complexity / difficulty / degree of interaction can be used depending on the user, its level, etc.

Set content

– A good part of the componenets required for the kit
– “Useless” extra components
– Prebuild arduino board for measuring resitance/capacitance/inductance
– Software

Technical implementation / Interaction description

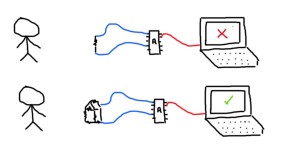
The prebuild arduino board should be used as a cheap multimeter that can be interfaced with the custom software.
The custom software will first prompt the user with some clear instructions on how to start soldering the kit.

Quickly, the user will reach a point where a component needed is not present as if, or even worse, the computer wont ask for a precise
component, but instead will only give hints of what is needed : a bigger resistance, a smaller inductance … The user will have then to
“build” the component himself by assembling parts from the “useless” extra components, and use the arduino board to ask the computer if
he’s getting closer of what’s needed.

The user is free to use part from outside the kit to achieve the goal. He might try with everyday life objects : piece of copper,
graphite, conductive ink, aluminum.


Lovely drawing...

Anti-Deskilling - Sketch

Discussion

I can see a couple of interesting reasons of building the kit this way. First, the user will gain an intuitive and informal knowledge of
the material he can use. Not only he can assmemble new pieces in a creative way, but there is also a new learning curve, for using various
parts (electronic, or not) in an unconventional manner. This idea is closer to the intimate knowledge of the material used by the craftman
versus a cold and mathematical count of colorful stripes on a resistor.
There are other learning paths for the user who doesn’t want to follow blindly the all-mighty computer : you can either improve your
knowledge of the inner working of the kit you’re building, so that you break free from the instructions all-together, or on the opposite
side of the spectrum, improve your knowledge of the inner working of the arduino/softaware tool we propose, and defeat it by building a new
tool that would go through all the expected values and therefore to unlock all the instructions.

In any case, the user must be more creative than if he were following a classical instruction manual, and learn from this experience,
which was the intended goal of the kit.

Inspiration and possible examples

Interactivus Botanicus

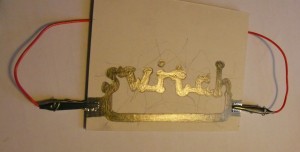
http://blog.ocad.ca/wordpress/digf6b02-fw2011-01/2011/10/assignment-5-a-switch-made-out-of-pencil-and-paper/

Switch - Anne Stevens

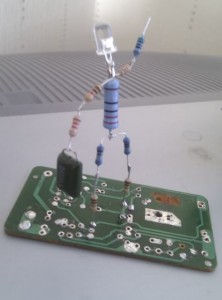
Resistor Man - fleck_bucket


Sand Tones online as Instructable

Monday, January 28th, 2013

Here is the Instructable for last term’s Sand Tones project – now aptly titled Craft Cymatics.

Anti-Deskilling Quilting

Monday, January 28th, 2013

The purpose of this kit is to allow for maximum creative control, while using the affordances of computer software to aid in the design process. Making the top of a patchwork quilt with squares of fabric requires little sewing skill. Essentially, the quiltmaker simply sews a series of straight line to join each square in a row, and then join the rows together. For that reason, I have not made alterations to the actual construction process.

The real craft of making a patchwork quilt is the design process: selecting fabrics and creating a pattern (simple or complex) to complement the color and print. The pattern making process includes determining the sequence, size and shape of the fabric squares. For this reason, this kit would include more fabric squares (in a wide variety of colors and prints) than necessary. Since the creation of the pattern is what I consider to be the critical skill in quilting, it would not be provided to the user. Simple directions would be provided to explain the construction process, but not a specific sequence of squares.

The digital component in this kit is provided by a software program that assists the user in the creation and alteration of the pattern. The analog design method would be to use graph paper and colored pencils. It’s a fine method, but difficult to make changes, experiment, and get a good sense of the finished product with simple markings. With the computer, the quilter could scan or photograph fabric swatches, creating digital fabric squares that are true to life. The program could use algorithms to generate symmetrical designs based on several rows designed by the user. With a few simple clicks, multiple squares can be swapped and changed, making the design process much faster.


Antideskilling:3D Wooden Puzzle Craft Kit

Monday, January 28th, 2013

3D Wooden Puzzle Craft Kit

Kit components (what we get from store):
wooden pieces, sand paper, instruction, glue

Procedure:
1. take wooden pieces out
2. make the wooden pieces smooth with sand paper
3. follow the instruction to assemble the pieces
4. fix it with glue

3D Wooden Puzzle Craft Kit Redesign

Kit components:
unfinished wooden pieces, sand paper, instruction, glue

And new components
saw, sanding sealer (a lacquer or other coating formulated to give better filling than the topcoat products), digital paint gun, paint (colors), rubbing compound, swirl mark remover, polishing compound

Wooden Piece

Rubbing Compound and Polishing Compound

Digital Paint Gun

Digital Paint Gun

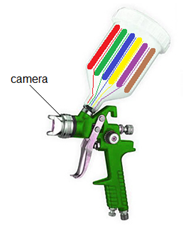
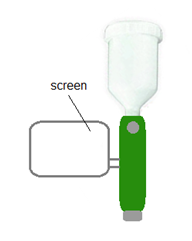
Digital paint gun can do color mixing and teach people how to paint on wood. The gun contains a couple of different paint colors inside and it will mix them to give the color that people want. The proportion of the colors will be shown on the screen of the gun so people learn how to match such color. As people painting, the camera on the gun will monitor their work and give people suggestion if some paint problem is detected. Mixed reality technology will be used here to point the problem spot to people so they can get it in an easy way.

Redesigned Procedure:
1. cut the wooden pieces with saw
2. make the wood pieces smooth with sand paper
3. make the wood pieces smoother with sanding sealer
4. paint with digital paint gun and let the color settle down
5. put rubbing compound and swirl mark remover
6. use polishing compound
7. follow the instruction to assemble the pieces
8. fix it with glue

Anti-deskill:
By playing with new craft kit, people learn the basic procedures and skills to make wooden craft.

Sketches from Keller and Keller

Thursday, January 24th, 2013

Below our scribbles from the Keller and Keller text – to guide your practice analysis for next week:

Second challenge

Wednesday, January 23rd, 2013

Based on our breakdown of the Keller & Keller text.

Find one practice you feel comfortable with and analyze it using Keller&Keller. What are the actions? What is the actions’ “emergent quality” that evolves from the activity system you are looking at? What knowledge is applied and altered in the process? At what stage is an “umbrella plan” defined? On what grounds is that plan made? What are the ingredients of that plan?

I would suggest to use the outline and key words we discussed in class to guide your analysis. This is meant to let us develop the method which we will apply to our analysis of an existing craft practice in the foreseeable future. So if you find a problem in the Keller & Keller approach and can provide an improvement – by all means.

Antideskilling: A whittler’s touchstone

Wednesday, January 23rd, 2013

Makers have more opportunities than ever before to put together almost anything they can dream of from a kit of parts. They assemble these pre-fabricated parts and components from directions, and ultimately have a working product. But is it a craft?

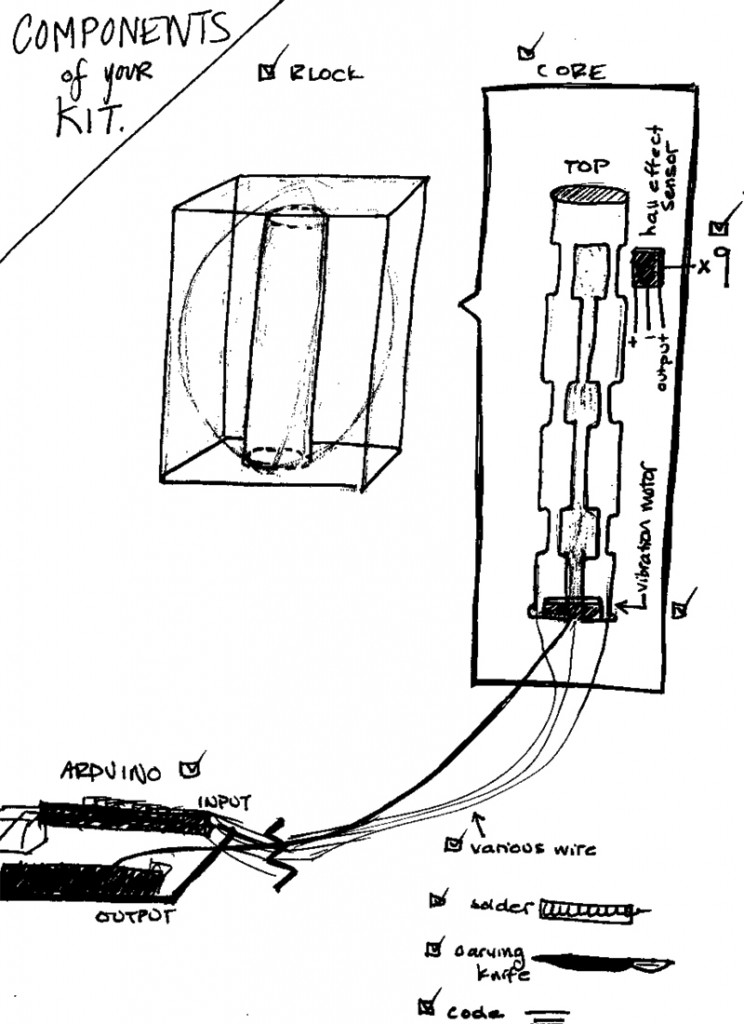
This project works in the tradition of such kits, providing directions and parts for the maker to assemble. The goal is to whittle an egg from a piece of wood. Wiring electrical components creates the feedback mechanism that steers whittlers toward an outcome. But unlike kits ordered from Sparkfun, Maker:Shed and other DIY supply shops, assembling the electrical components does not itself constitute a finished product.The maker must exercise patience and manual skill manipulating wooden materials with a knife.

The hope here is that digital components mentor amateur crafters toward a tacit understanding of the raw materials they manipulate with tools. Whittling is a simple handicraft amenable to this sort of digital intervention. Newcomers to whittling usually undertake this simple project first: fashion an egg from a block of wood. The task reveals the responsiveness of wood to the force of a knife. The wood grain, the choice between a push or a pull stroke, and the wood’s hardness all have to be negotiated in this beginner’s project. The use of specialized tools is a contentious point among whittlers. Purists consider a sharp pocket knife the only suitable option since anything specialized reconstitute the practice as carving. They also reject the use of stainless steel knives, since they cannot be suitably sharpened.

Whittling is undertaken by individuals slowly passing time. As such it resists ever being subsumed by mechanization since this would remove whittling’s essential context. Master whittlers who find faces in fallen branches will never be “workers” in Rissati’s sense, since the spontaneous discovery of form with natural materials is never “simply labor produced by the non-creative hand.” Craftsmanship “depends on the judgement, dexterity and care which the maker exercises as he works.” This kit helps the amateur acquire a sensitivity to the relationship between material, tool and form, so that better judgement, dexterity and care can be applied to more ambitious projects in the future.

The Kit:


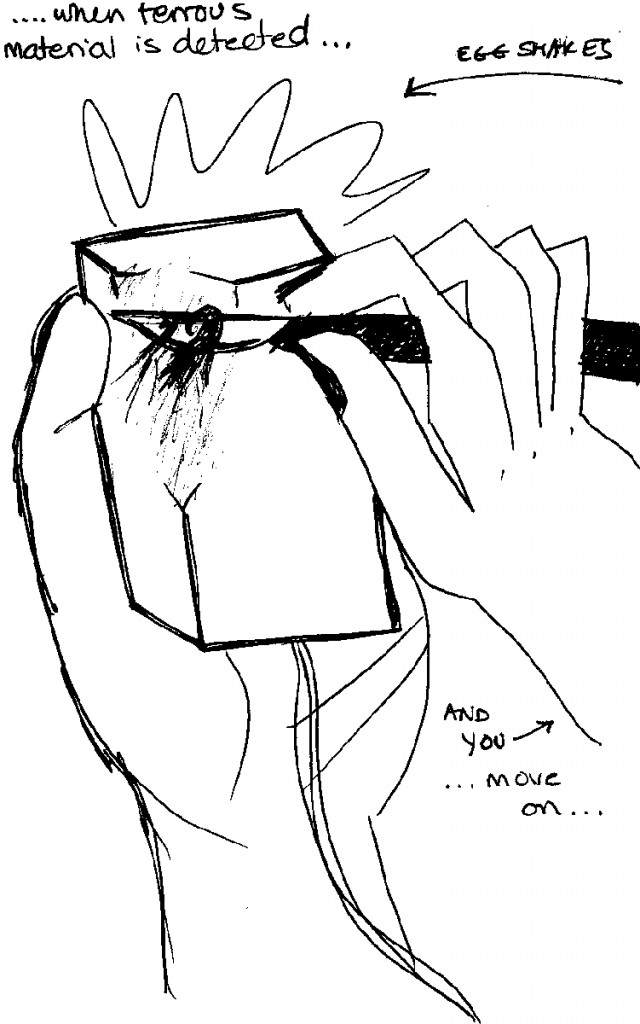
A block of balsa wood has a hollow core. Into this core we’ll insert a dowel with 3 notches on three facets, for a total of 9 notches. Into these notches, the maker will affix small and inexpensive hall effect sensors. These sensors act as proximity sensors for ferrous materials. When the steel (an iron alloy) knife comes within a calibrated distance to the sensor from outside the wood, the sensor will trigger a small vibration actuator that shakes the egg. This tells the whittler that the cut in this particular area is deep enough, and that it is time to move on to another area to shape the egg. Once the egg has been fashioned on all sides, the core can be removed. The end product contains no electronic parts. The wiring acts as tutor, and provides feedback to guide the amateur’s exploration.

First 2013 challenge: Anti-deskilling

Wednesday, January 16th, 2013

Design challenge: This assignment builds on a combination of Dormer, Risatti, and McCullough. McCullough particularly calls for a “defense of skill” and Dormer (and others) discuss the difference between assembly and craft in a comparable way. Between following rules, which could be done by a machine, vs creative making, which depends on the personal investment and skill.
Your design challenge is in-between these poles: present a kit of prepared items and simple to follow rules toward a specific object, but (re)design this kit in such a way that one specific skill is not replaced by the materials and manuals at hand. Include a digital component in that kit.